Introduction
In the last blog post, we created a test API in ASP.NET Core. If you haven't checked that, here's the link for that blog. In this blog post, we'll walk you through the steps to integrate Hangfire in your ASP.NET Core project to schedule an API to run daily. Hangfire is a powerful library that simplifies background job processing in .NET applications, making it an excellent choice for scheduling tasks. Follow along to learn how to set up Hangfire and configure it to run your API on a daily basis.
Why Use Hangfire for Background Jobs in ASP.NET Core?
Before diving into the implementation, let's understand why Hangfire is a preferred choice for background jobs:
- Ease of Use: Hangfire is simple to set up and use, allowing you to focus on your application's core functionality.
- Scalability: It can handle a large number of jobs and is scalable to meet your application's demands.
- Reliability: Hangfire ensures that jobs are executed even after server restarts, providing reliability for critical tasks.
- Dashboard: It comes with a built-in dashboard for monitoring jobs, making it easy to track and manage background processes.
Types of Scheduling Provided by Hangfire
- Fire-and-Forget Jobs: These jobs are executed only once and almost immediately after creation. They are useful for tasks that need to be done quickly and don’t need to be repeated.
BackgroundJob.Enqueue(() => Console.WriteLine("Fire-and-forget job executed!"));- Delayed Jobs: These jobs are executed only once but not immediately. They are scheduled to run after a specified delay.
BackgroundJob.Schedule(() => Console.WriteLine("Delayed job executed!"), TimeSpan.FromDays(1));- Recurring Jobs: These jobs are executed many times on a specified CRON schedule. They are useful for tasks that need to run on a regular basis.
RecurringJob.AddOrUpdate(() => Console.WriteLine("Recurring job executed!"), Cron.Daily);- Continuations: These jobs are executed when their parent job has finished. They are useful for workflows where a job depends on the successful completion of another job.
var jobId = BackgroundJob.Enqueue(() => Console.WriteLine("Parent job executed!"));
BackgroundJob.ContinueWith(jobId, () => Console.WriteLine("Continuation job executed!"));
Prerequisites
- Visual Studio 2019 or later
- .NET Core SDK installed
- Basic knowledge of ASP.NET Core
Step-by-Step Guide to Integrate Hangfire
Step 1: Create a New ASP.NET Core Web API Project
First, create a new ASP.NET Core project or open an existing one. If you don't have any project, then follow the steps mentioned here to create one. I have also added the steps for creating a test API.
Step 2: Install Hangfire NuGet package
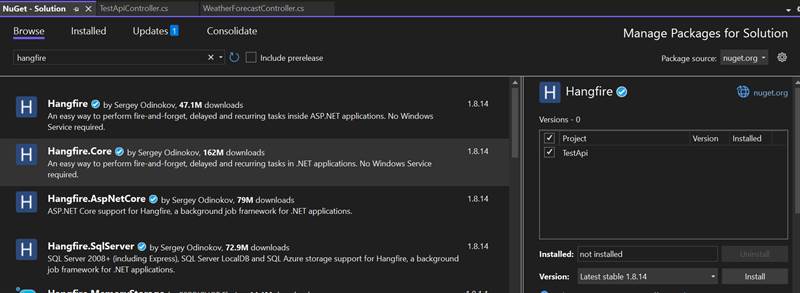
- Go to Tools > NuGet Package Manager > Manage NuGet Packages for Solution...
- Search for Hangfire and install the latest one.
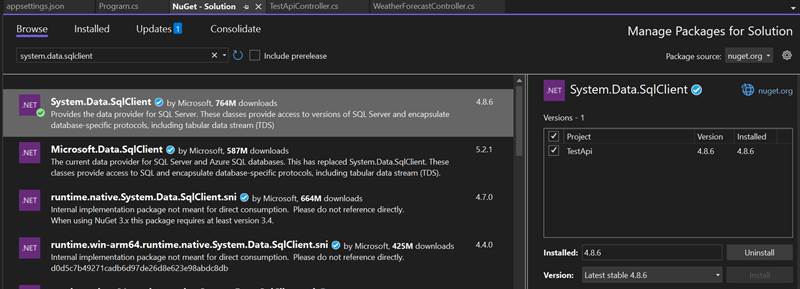
- Search for System.Data.SqlClient and install the latest one.
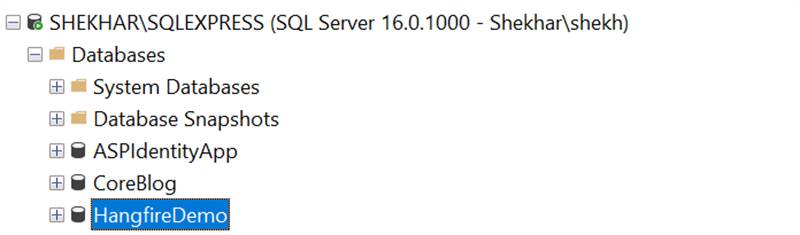
Step 3: Create a database for using with Hangfire
Open SSMS and create a new Database. You can use the existing one also.
Step 4: Add connection string to appsettings.json
In the appsettings.json file, add the connection string for your SQL Server:
{
  "Logging": {
    "LogLevel": {
      "Default": "Information",
      "Microsoft.AspNetCore": "Warning"
    }
  },
  "AllowedHosts": "*",
  "ConnectionStrings": {
    "TestDatabase": "Server=SHEKHAR\\SQLEXPRESS;Database=HangfireDemo;TrustServerCertificate=True;User Id=adminuser;Password=adminuser;"
  }
}
Step 5: Configure Hangfire in Program.cs
using Hangfire;
using Hangfire.SqlServer;
var builder = WebApplication.CreateBuilder(args);
// Add services to the container.
builder.Services.AddControllers();
// Learn more about configuring Swagger/OpenAPI at https://aka.ms/aspnetcore/swashbuckle
builder.Services.AddEndpointsApiExplorer();
builder.Services.AddSwaggerGen();
// Step 1 -> Hangfire configuration with SQL Server storage
var connectionString = builder.Configuration.GetConnectionString("TestDatabase");
builder.Services.AddHangfire(config =>
{
    config.UseSqlServerStorage(connectionString, new SqlServerStorageOptions
    {
        CommandBatchMaxTimeout = TimeSpan.FromMinutes(5),
        SlidingInvisibilityTimeout = TimeSpan.FromMinutes(5),
        QueuePollInterval = TimeSpan.Zero,
        UseRecommendedIsolationLevel = true,
        DisableGlobalLocks = true
    });
});
// Step 2 -> Add Hangfire's server.
builder.Services.AddHangfireServer();
var app = builder.Build();
// Configure the HTTP request pipeline.
if (app.Environment.IsDevelopment())
{
    app.UseSwagger();
    app.UseSwaggerUI();
}
app.UseHttpsRedirection();
app.UseAuthorization();
app.MapControllers();
//Step 3 -> Added the dashboard url
app.UseHangfireDashboard("/hangfire");
app.Run();
Step 6: Create a Background Job to Call the API
- Create a background job that calls your API. For this example, I am using my API endpoint which is https://localhost:7282/api/TestApi. We need to create a service to call this endpoint and then schedule it with Hangfire.
- Create a new service class ApiCallService.cs and add the below code:
namespace TestApi
{
    public class ApiCallService
    {
        private readonly HttpClient _httpClient;
        public ApiCallService(HttpClient httpClient)
        {
            _httpClient = httpClient;
        }
        public async Task CallApiEndpointAsync()
        {
            var response = await _httpClient.GetAsync("https://localhost:7282/api/TestApi");
            response.EnsureSuccessStatusCode();
            // Log success or handle the response as needed
        }
    }
}
Register the HttpClient and ApiCallService in Program.cs:
builder.Services.AddHttpClient<ApiCallService>();
Schedule the job in Program.cs:
// Schedule the job to call the API endpoint
RecurringJob.AddOrUpdate<ApiCallService>("call-api-endpoint", service => service.CallApiEndpointAsync(), Cron.Daily); // Adjust the schedule as needed
Final Program.cs code:
using Hangfire;
using Hangfire.SqlServer;
using TestApi;
var builder = WebApplication.CreateBuilder(args);
// Add services to the container.
builder.Services.AddControllers();
// Learn more about configuring Swagger/OpenAPI at https://aka.ms/aspnetcore/swashbuckle
builder.Services.AddEndpointsApiExplorer();
builder.Services.AddSwaggerGen();
// Step 1 -> Hangfire configuration with SQL Server storage
var connectionString = builder.Configuration.GetConnectionString("TestDatabase");
builder.Services.AddHangfire(config =>
{
    config.UseSqlServerStorage(connectionString, new SqlServerStorageOptions
    {
        CommandBatchMaxTimeout = TimeSpan.FromMinutes(5),
        SlidingInvisibilityTimeout = TimeSpan.FromMinutes(5),
        QueuePollInterval = TimeSpan.Zero,
        UseRecommendedIsolationLevel = true,
        DisableGlobalLocks = true
    });
});
// Step 2 -> Add Hangfire's server.
builder.Services.AddHangfireServer();
// Register httpclient
builder.Services.AddHttpClient<ApiCallService>();
var app = builder.Build();
// Configure the HTTP request pipeline.
if (app.Environment.IsDevelopment())
{
    app.UseSwagger();
    app.UseSwaggerUI();
}
app.UseHttpsRedirection();
app.UseAuthorization();
app.MapControllers();
//Step 3 -> Added the dashboard url
app.UseHangfireDashboard("/hangfire");
// Schedule the job to call the API endpoint
RecurringJob.AddOrUpdate<ApiCallService>("call-api-endpoint", service => service.CallApiEndpointAsync(), Cron.Daily); // Adjust the schedule as needed
app.Run();
Step 7: Run and Monitor Your Application
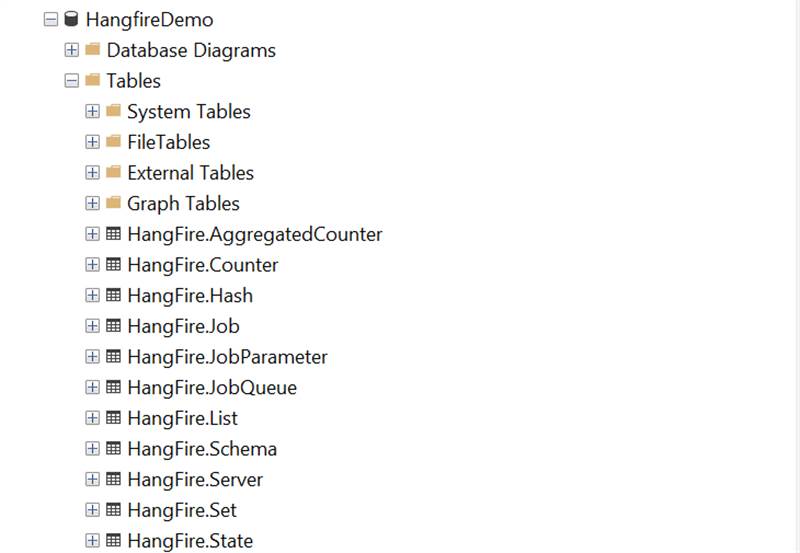
After running the project. You will see some new tables got created in the database. Hangfire creates those to track the jobs and to perform other things:
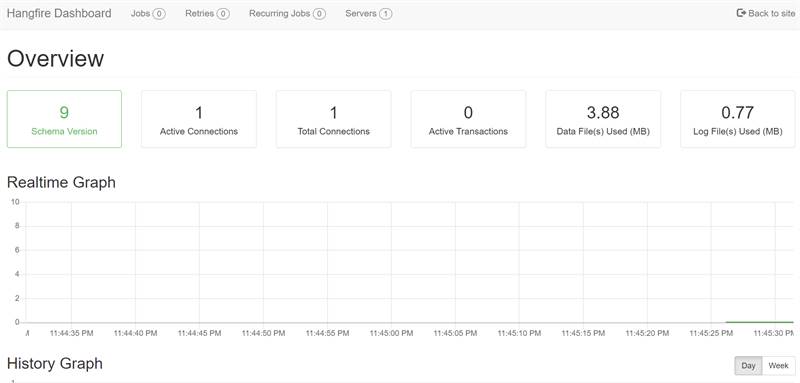
Access the Hangfire Dashboard at https://localhost:7282/hangfire/ to monitor your background jobs.
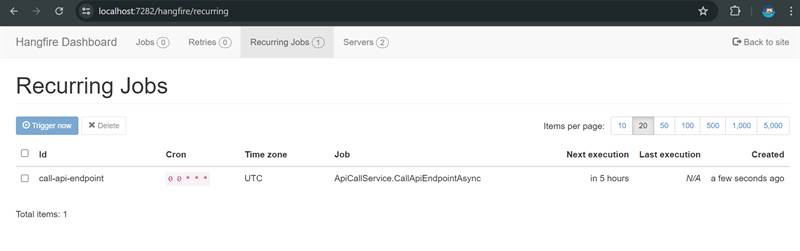
Click on Recurring Jobs tab to see all the recurring jobs. Currently it's showing only one which we have scheduled.
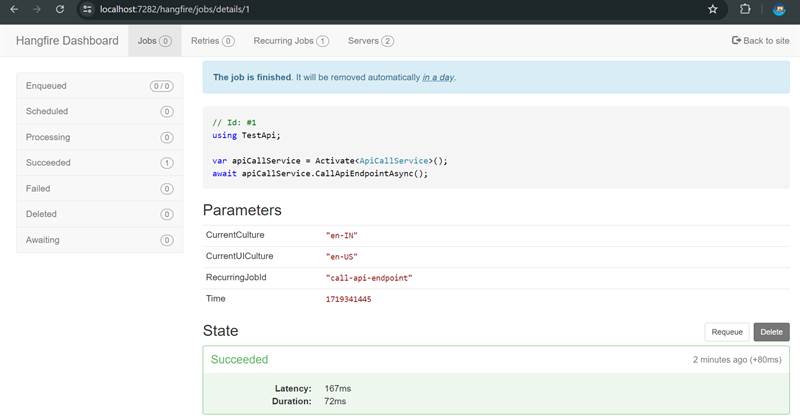
Click on Jobs > Succeeded to see the status of the jobs.
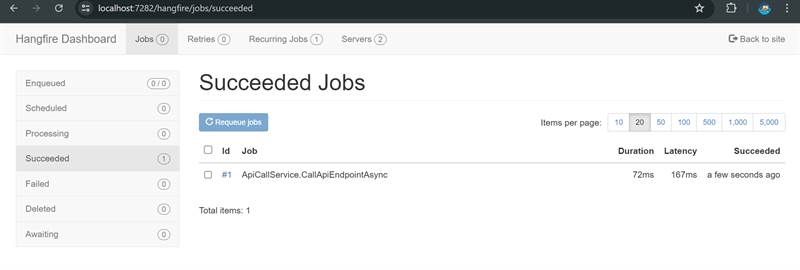
To get more details click on that job:
Final code on GitHub:
Here's the GitHub link for the repo where all the code has been added.
Conclusion
By following this guide, you have integrated Hangfire into your .NET 8 project and scheduled an API call using Hangfire with SQL Server as the storage provider. This setup ensures your API is called regularly according to the specified schedule. For more advanced Hangfire configurations and storage options, refer to the official Hangfire documentation.
