
Introduction
Reading and displaying data from a CSV file is a common requirement in web applications. In this guide, we'll walk through the steps to build an ASP.NET Core 8 application that reads a CSV file uploaded by a user and displays the data in a styled HTML table. We'll also cover error handling to manage any issues that may arise during the file processing.
Step 1: Create a New ASP.NET Core Web Application
Start by creating a new ASP.NET Core Web Application:
dotnet new webapp -n CsvReaderApp
Step 2: Install CsvHelper Package
Install the CsvHelper package which will help us read the CSV file:
dotnet add package CsvHelper
Step 3: Add the User Model
Create a new folder called Models and add a User.cs file. The headers of the CSV file and the fields here should match as we will be getting the data into this model.
namespace CsvReaderApp.Models
{
    public class User
    {
        public int Id { get; set; }
        public string Name { get; set; }
        public string Email { get; set; }
    }
}
Step 4: Add the CsvService Class
Create a new folder called Services and add a CsvService.cs file. This class will be responsible for parsing the CSV file and converting it to a list of User objects.
using CsvHelper;
using CsvHelper.TypeConversion;
using CsvReaderApp.Models;
using System.Globalization;
namespace CsvReaderApp.Services
{
    public class CsvService
    {
        public IEnumerable<User> ReadCsvFile(Stream fileStream)
        {
            try
            {
                using (var reader = new StreamReader(fileStream))
                using (var csv = new CsvReader(reader, CultureInfo.InvariantCulture))
                {
                    var records = csv.GetRecords<User>();
                    return records.ToList();
                }
            }
            catch (HeaderValidationException ex)
            {
                // Specific exception for header issues
                throw new ApplicationException("CSV file header is invalid.", ex);
            }
            catch (TypeConverterException ex)
            {
                // Specific exception for type conversion issues
                throw new ApplicationException("CSV file contains invalid data format.", ex);
            }
            catch (Exception ex)
            {
                // General exception for other issues
                throw new ApplicationException("Error reading CSV file", ex);
            }
        }
    }
}
Step 5: Create the CsvImporterController
Create a new folder called Controllers and add a CsvImporterController.cs file:
using CsvReaderApp.Models;
using CsvReaderApp.Services;
using Microsoft.AspNetCore.Mvc;
namespace CsvReaderApp.Controllers
{
    [Route("[controller]")]
    public class CsvImporterController : Controller
    {
        private readonly CsvService _csvService;
        public CsvImporterController(CsvService csvService)
        {
            _csvService = csvService;
        }
        [HttpGet("")]
        [HttpGet("Index")]
        public IActionResult Index()
        {
            return View(new List<User>());
        }
        [HttpPost("")]
        [HttpPost("Index")]
        public IActionResult Index(IFormFile csvFile)
        {
            if (csvFile != null && csvFile.Length > 0)
            {
                using (var stream = csvFile.OpenReadStream())
                {
                    try
                    {
                        var users = _csvService.ReadCsvFile(stream).ToList();
                        return View(users); // Return users list to the view
                    }
                    catch (ApplicationException ex)
                    {
                        ModelState.AddModelError(string.Empty, ex.Message);
                    }
                    catch (Exception ex)
                    {
                        ModelState.AddModelError(string.Empty, $"An unexpected error occurred: {ex.Message}");
                    }
                }
            }
            else
            {
                ModelState.AddModelError(string.Empty, "Please select a valid CSV file.");
            }
            return View(new List<User>());
        }
    }
}
Step 6: Create the View
Right click on the Index action method on controller and click on Add View and give it a name as Index.cshtml:
@model IEnumerable<CsvReaderApp.Models.User>
<!DOCTYPE html>
<html lang="en">
<head>
    <meta charset="UTF-8">
    <meta name="viewport" content="width=device-width, initial-scale=1.0">
    <title>CSV File Upload</title>
    <link rel="stylesheet" href="~/css/site.css">
</head>
<body>
    <div class="container">
        <h1>Upload CSV File</h1>
        <form asp-controller="Home" asp-action="Upload" method="post" enctype="multipart/form-data">
            <div class="form-group">
                <input type="file" name="csvFile" class="form-control" required>
            </div>
            <button type="submit" class="btn btn-primary">Upload</button>
        </form>
        @if (Model != null && Model.Any())
        {
            <h2>User List</h2>
            <table class="table">
                <thead>
                    <tr>
                        <th>Id</th>
                        <th>Name</th>
                        <th>Email</th>
                    </tr>
                </thead>
                <tbody>
                    @foreach (var user in Model)
                    {
                        <tr>
                            <td>@user.Id</td>
                            <td>@user.Name</td>
                            <td>@user.Email</td>
                        </tr>
                    }
                </tbody>
            </table>
        }
    </div>
</body>
</html>
Step 7: Configure Services and Routing
I am using .NET 8. Here, we don't have the Startup.cs file. Instead, we have to configure services and routing in the Program.cs file. Open the Program.cs file and update it as follows:
using CsvReaderApp.Services;
var builder = WebApplication.CreateBuilder(args);
// Add services to the container.
builder.Services.AddRazorPages();
builder.Services.AddTransient<CsvService>(); // Register CsvService
var app = builder.Build();
// Configure the HTTP request pipeline.
if (!app.Environment.IsDevelopment())
{
    app.UseExceptionHandler("/Error");
    // The default HSTS value is 30 days. You may want to change this for production scenarios, see https://aka.ms/aspnetcore-hsts.
    app.UseHsts();
}
app.UseHttpsRedirection();
app.UseStaticFiles();
app.UseRouting();
app.MapControllerRoute(
        name: "default",
        pattern: "{controller=CsvImporter}/{action=Index}/{id?}");
app.UseAuthorization();
app.MapRazorPages();
app.Run();
Step 8: Add CSS for Styling
Create a wwwroot/css/site.css file to style the form and table:
html {
    font-size: 14px;
}
@media (min-width: 768px) {
    html {
        font-size: 16px;
    }
}
.btn:focus, .btn:active:focus, .btn-link.nav-link:focus, .form-control:focus, .form-check-input:focus {
    box-shadow: 0 0 0 0.1rem white, 0 0 0 0.25rem #258cfb;
}
html {
    position: relative;
    min-height: 100%;
}
body {
    font-family: Arial, sans-serif;
    background-color: #f4f4f4;
    margin: 0;
    padding: 20px;
    margin-bottom: 60px;
}
.container {
    max-width: 800px;
    margin: 0 auto;
    background-color: #fff;
    padding: 20px;
    border-radius: 8px;
    box-shadow: 0 0 10px rgba(0,0,0,0.1);
}
h1, h2 {
    text-align: center;
}
form {
    margin-bottom: 20px;
}
.form-group {
    margin-bottom: 15px;
}
.form-control {
    width: 100%;
    padding: 10px;
    border: 1px solid #ccc;
    border-radius: 4px;
}
.btn-primary {
    background-color: #007bff;
    color: #fff;
    padding: 10px 20px;
    border: none;
    border-radius: 4px;
    cursor: pointer;
}
    .btn-primary:hover {
        background-color: #0056b3;
    }
.table {
    width: 100%;
    border-collapse: collapse;
    margin-top: 20px;
}
    .table th, .table td {
        padding: 12px;
        border: 1px solid #ccc;
    }
    .table th {
        background-color: #f2f2f2;
    }
Final Output:
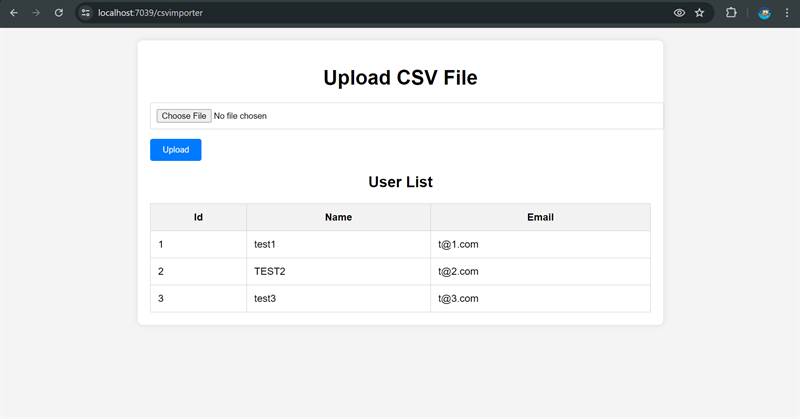
As we have added a routing, you will get the output here in this URL: https://localhost:7039/csvimporter. This is how it looks after selecting the file and clicking on upload:
Complete Code on GitHub
For the complete code with a csv file for testing, you can visit the GitHub repository. Feel free to clone or download the project and experiment with it further.
Conclusion
By following these steps, you can create an ASP.NET Core 8 application that allows users to upload CSV files and displays the data in a styled HTML table. This setup includes proper error handling to manage any issues that may arise during file processing. Happy coding!
