
Introduction:
Uploading files to a server is a common requirement in web development projects. In this blog, we will explore how to implement file uploads using Classic ASP, providing step-by-step guidance and examples. Classic ASP is a server-side scripting language that is still widely used, and understanding how to handle file uploads with it is essential for web developers working with legacy systems.
Step 1: Setting up the project
Let’s setup the project first.
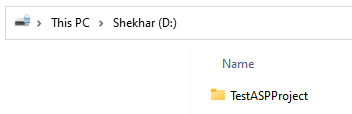
1. Create a new folder for storing the project files.
2. Open the folder and create a new asp file. I have named the file as uploadhelper.asp.
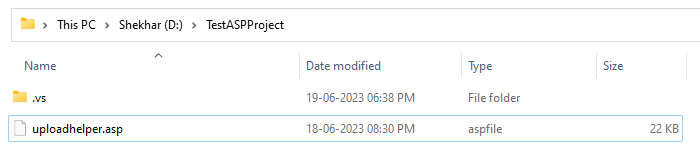
3. Paste the below code into uploadhelper.asp. This code is going to help in uploading the file. I found this code while searching for ways to create the uploader. I had to make a lot of changes to this file to make it to work. Now, it’s working. I have set the upload limit to close to 50 MB in the first line of code.
4. We need to create a form, which will be having the file selector and a button to upload the selected files. Create a new asp file, let’s call it as uploadhelpertest.asp.
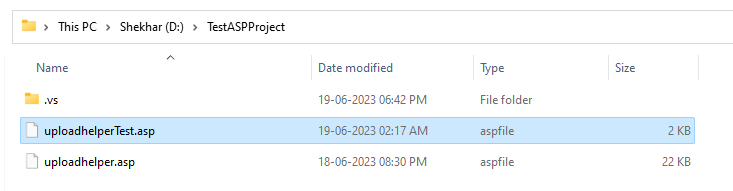
5. Paste the below code into uploadhelperTest.asp.
Explanation of the above code:
· We are including the uploadhelper.asp first.
· We have a created a form with post action. It’s having an input of type file and a button of type submit.
· At the end, we are having server code. It’s looping over submitted file, It’s printing the details of the file and saving the file one by one to the folder “D:\TestASPProject\Photos”.
6. As we are trying to saving the files to the folder “D:\TestASPProject\Photos”. We need to make sure that the folder is present on the path else it will throw the error. Let’s create a new folder called Photos.

Step 2: Publishing the project to IIS
1. If you don’t have IIS installed in your machine. Please follow the tutorial here, I have already written a blog to setup IIS.
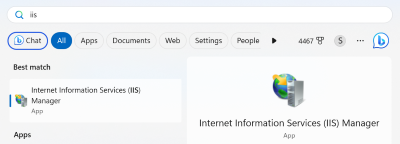
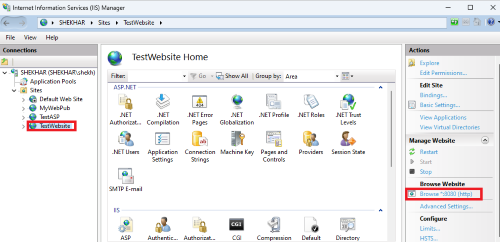
2. Let’s setup our project in IIS. Open Internet Information Services (IIS) Manager.
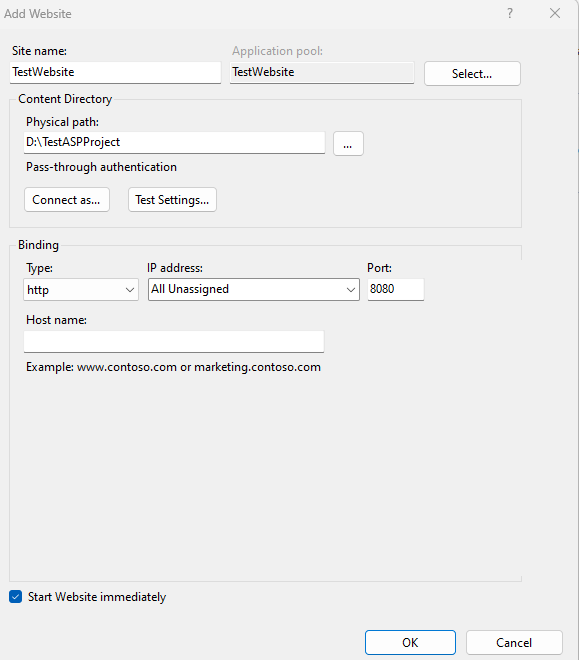
3. Expand the directory. Right click Sites and select Add Website…

4. Enter the Site name. Select the project folder in Physical path input and set the bindings. I have selected the port 8080. Click OK to finish the setup.
Step 3: Enable Directory Browsing
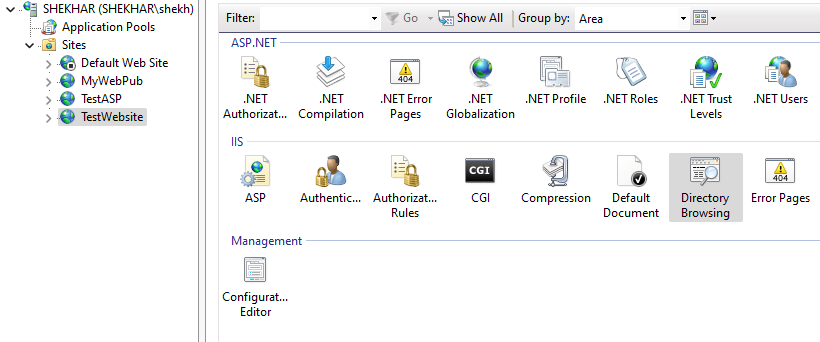
1. We have successfully published the site. We just need to perform few configuration. Click on the website and under IIS, click on Directory Browsing. If it is not showing under IIS, then you might have not selected this while setting up the IIS.
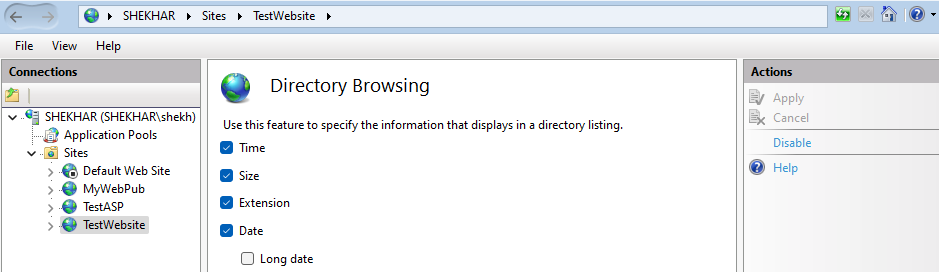
2. Click on the Open Feature button on the right side.

3. Click on the Enable button to enable the directory browsing.

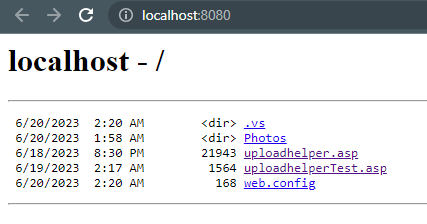
4. Now we can browse the files after running the project.
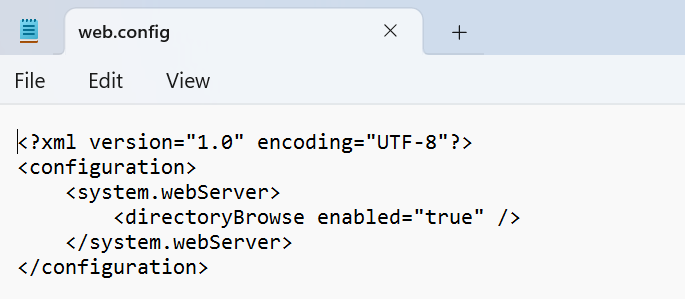
5. After enabling the Directory Browsing. A web.config file will be added to our project folder.
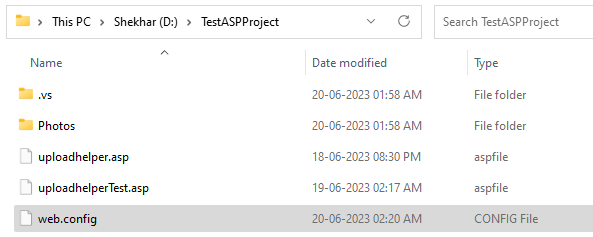
6. It will store the settings. When opening the file, it is having the below content.
7. You will get the below screen when running the website.
Step 4: Setup Upload Limit
In the uploadhelper.asp file, we have already setup the upload limit to close to 50 MB. But, that’s not enough, we need to setup the upload limit on IIS also to allow the operation. Otherwise, you will get many errors. Let’s setup those:
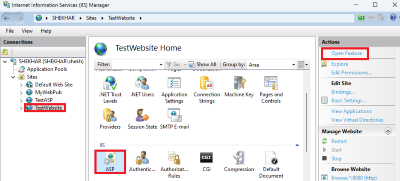
1. Click on website and select ASP. Click on Open Feature.
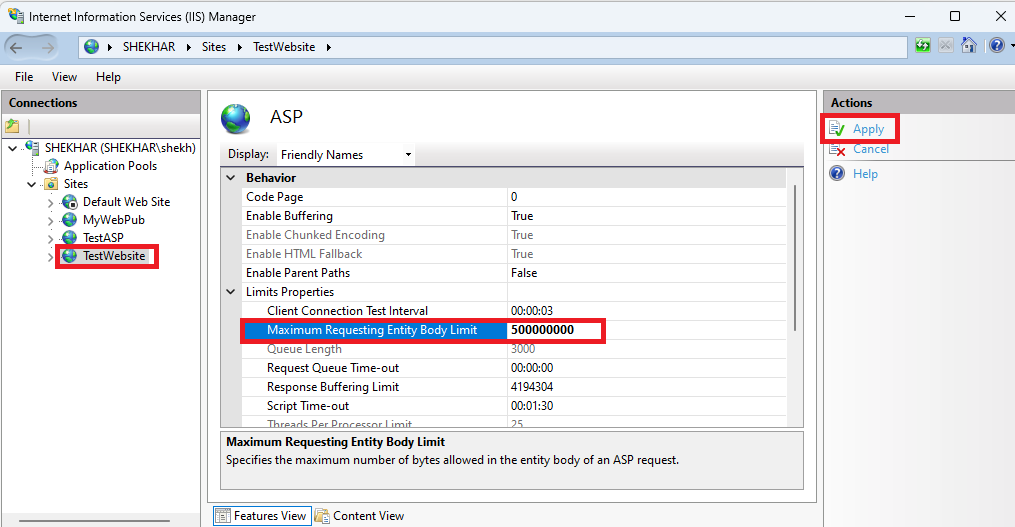
2. Expand Limits Properties. Set Maximum Requesting Entity Body Limit to 500000000 and click on Apply to save the settings.
3. We need to setup one more thing. Click your website and select the Request Filtering. Click on Open Feature.

4. Click on Edit Feature Settings…

5. Update the Maximum allowed content length (Bytes) to 500000000 and click OK to save the setting.
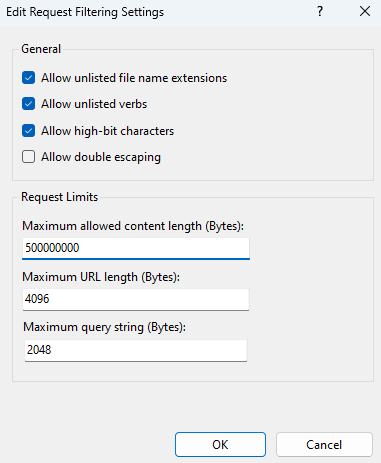
6. It will update the web.config.

Step 5: Testing the website
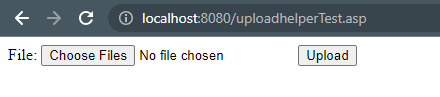
1. Click on Browse to open the website.
2. Click on uploadhelperTest.asp.

3. It will show the below screen.
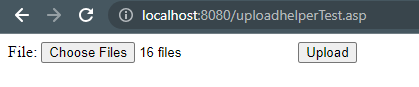
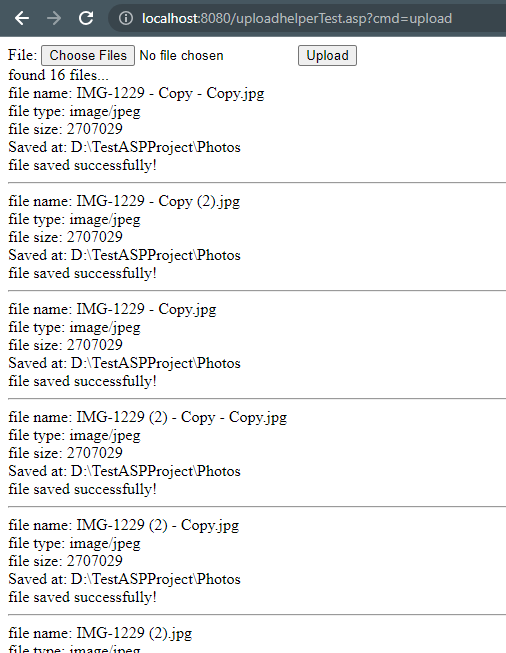
4. Click on Choose Files. I am selecting 16 files having total of 38 MB.
5. Click on Upload. It has printed the file details and showing the message as five saved successfully!
6. Let’s check on our Photos folder. All the uploaded photos have been saved to this folder.

Note:If you want to modify the upload limit, then first make the change on the uploadhelper.asp file. In the first line, there is constant called MAX_UPLOAD_SIZE. Set that with whatever limit you want to set. Then, set the Maximum Requesting Entity Body Limit of the ASP Feature and Maximum allowed content length of the Request Filtering to the exact same limit.
Project Code is available here.
Conclusion:
Handling file uploads in Classic ASP is essential for developers working with legacy systems. In this blog, we learned how to implement a file uploader using Classic ASP, following a step-by-step approach. By setting up the environment, creating an HTML form, and writing server-side code, we were able to successfully handle file uploads and store them on the server. Remember to adjust the file upload folder and permissions as needed in your specific scenario.
File uploads are a critical feature in many web applications, and understanding how to implement them using Classic ASP allows you to work effectively with existing systems. With this knowledge, you can enhance user experiences by enabling seamless file transfers between clients and servers.
