Introduction:
Welcome to the digital era, where websites have become an integral part of our lives. If you're a web developer or aspiring to be one, understanding web server technologies is essential. In this step-by-step guide, I'll take you on a journey to set up Internet Information Services (IIS) on your Windows machine. Get ready to unlock a world of endless possibilities as you dive into the realm of web development!
Step 1: Preparing for the Journey
Before embarking on this exciting adventure, make sure you have a Windows machine up and running. IIS is a native web server provided by Microsoft, so it's pre-installed on most Windows versions. To check if IIS is already installed, follow these steps:
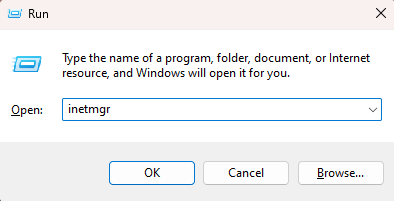
1. Press the Windows key + R, type "inetmgr" in the Run dialog box, and hit Enter.
2. If the IIS Manager window opens, congratulations! IIS is already installed. Otherwise, move on to step 2.
Step 2: Unveiling the IIS Installation Wizard
If IIS isn't installed, fear not! We'll use the IIS Installation Wizard to bring it to life. Here's how:
1. Open the Control Panel by searching for it in the Start menu.
2. Click on "Programs".
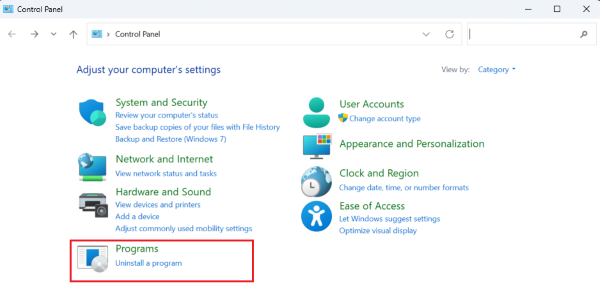
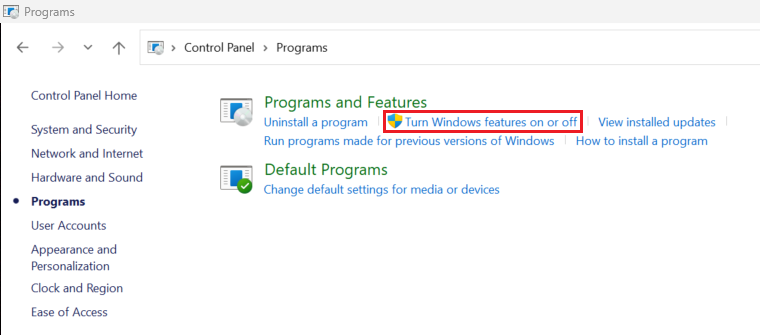
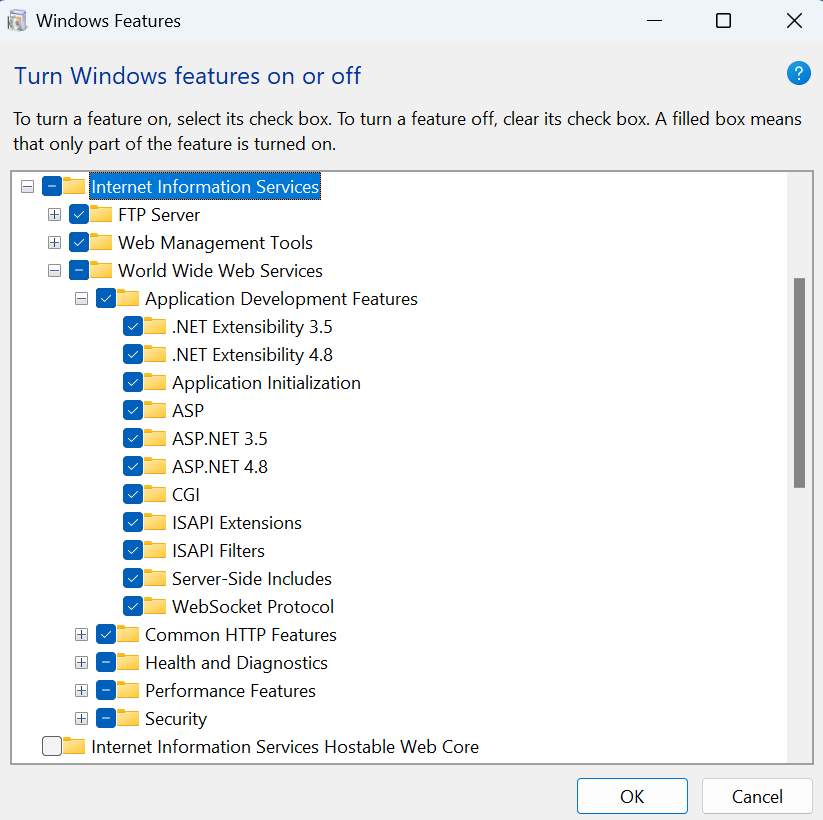
3. Select "Turn Windows features on or off."
4. In the Windows Features window, locate "Internet Information Services" and expand its node.
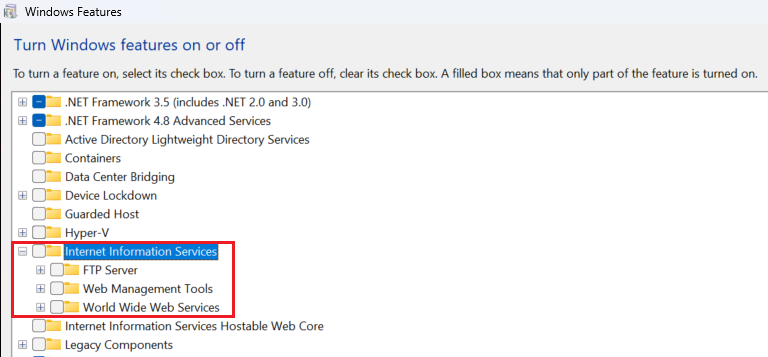
5. Select the desired components you wish to install, such as "Web Management Tools" and "World Wide Web Services." You can also choose additional features like FTP server or CGI support.
6. Make sure to select the IIS Management Console. Click "OK" and let the installation process work its magic.
7. Restart the computer after the installation.
Step 3: Open the IIS Manager
With IIS successfully installed, let's open the IIS Manager and see what’s in there:
1. Launch the IIS Manager by pressing the Windows key + R, typing "inetmgr," and hitting Enter.
2. In the IIS Manager window, you'll find the left-hand navigation pane. Expand the node for your computer.
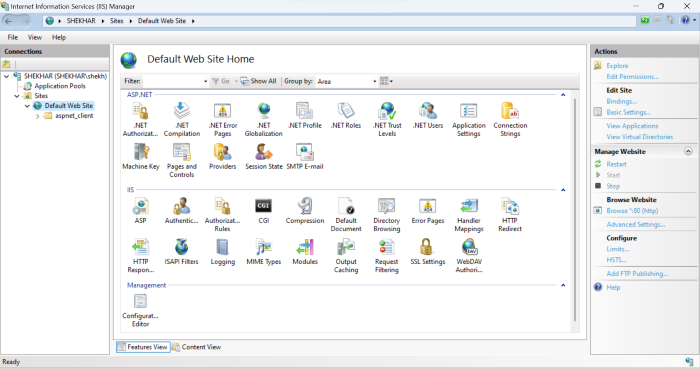
3. It currently having one default web site. On the right hand side, we are having options for managing the web sites.
Step 4: Testing Your Web Server
Let’s run the default web site:
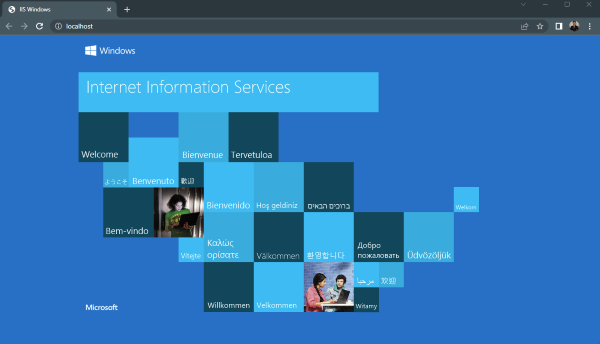
1. Open a web browser and type "localhost" or "127.0.0.1" into the address bar.
2. If the website loads successfully, congratulations! Your IIS setup is complete.
3. You will get the below screen when running the default site.
Conclusion:
Congratulations! You've successfully embarked on the journey to set up IIS on your Windows machine. With IIS at your disposal, you have the power to develop and deploy dynamic web applications, opening doors to a vast array of possibilities. Keep exploring the world of web development, and remember to refer back to this guide whenever you need to set up IIS on another Windows machine. Happy coding!
Note: Depending on your Windows version and requirements, certain steps or options might differ slightly. Always refer to the official Microsoft documentation for the most up-to-date instructions.
