
Introduction:
Welcome, fellow DevOps enthusiasts! Today, we embark on a thrilling journey to explore the wonders of Azure DevOps pipelines and the captivating realm of managed identity service connections. Get ready to witness the magic as we unveil the secret sauce for running SQL scripts seamlessly within your pipeline. Buckle up and let's dive in!
Prerequisites:
Before we dive into the enchanting world of running SQL scripts in an Azure DevOps pipeline using a managed identity service connection, there are a few prerequisites you need to have in place:
1. Azure DevOps Account: Ensure that you have an active Azure DevOps account. If you don't have one, you can sign up for free at https://azure.microsoft.com/en-us/services/devops/.
2. Azure SQL Database: You should have an existing Azure SQL Database or create a new one that you'll be using to execute your SQL scripts. Make sure you have the necessary permissions to access and modify the database.
3. Azure DevOps Pipeline: Set up an Azure DevOps pipeline for your project. If you're new to Azure DevOps pipelines, don't worry! I'll guide you through the process in this blog.
4. Managed Identity: We will be using Managed Identity in this blog. If you are not aware of what it is, I have already written a blog, do visit here to read it and familiarize yourself with the concept.
Now that we have the prerequisites covered, let's proceed with the steps to run SQL scripts in Azure DevOps pipeline using a managed identity service connection.
Step 1: Create a Service Connection in Azure Pipelines
1. Open your Azure DevOps organization and navigate to your project.
2. Go to Project settings.
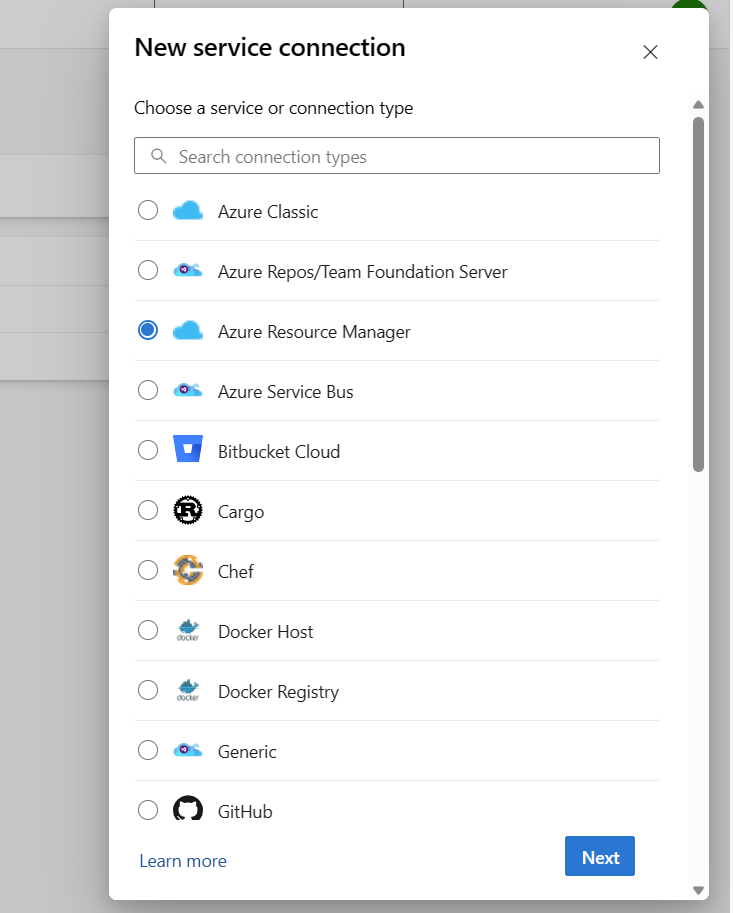
3. Select Service connections under the Pipelines section and click on New service connection.

4. Choose the appropriate service connection type based on your requirements. For example, you can select Azure Resource Manager for interacting with Azure resources.
5. Select the Azure Resource Manager option and click on Next.
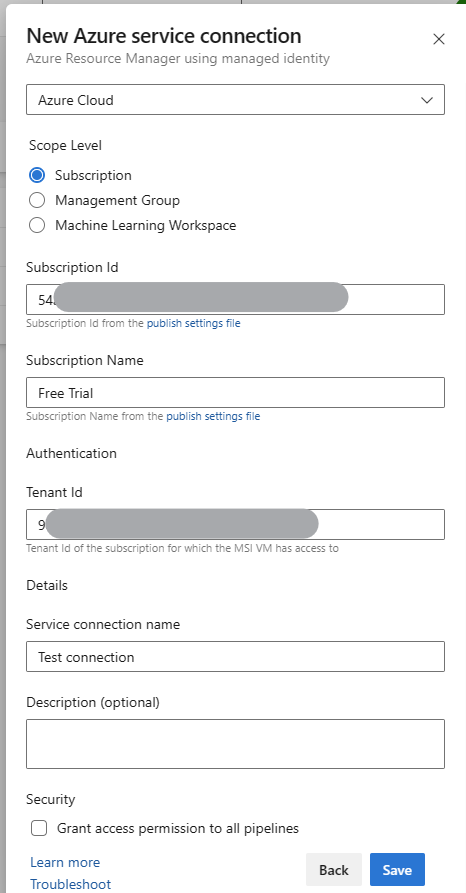
6. Choose Managed identity and click on Next.

7. Enter the Subscription Id, Subscription Name, Tenant Id and Service connection name. You can get Tenant id by going to Overview page of Azure Active Directory.
8. Click on Save to create the service connection.
Step 2: Create Azure VM & turn on System assigned Identity
Now, you might be thinking, why we need an Azure virtual machine?
When you create a release pipeline and select the service connection with managed identity. A small note comes below the service connection, which says, “Managed Service Identity service connection scope is limited to access granted to the Azure virtual machine running the agent. Ensure that the VM has access to specified resources.”
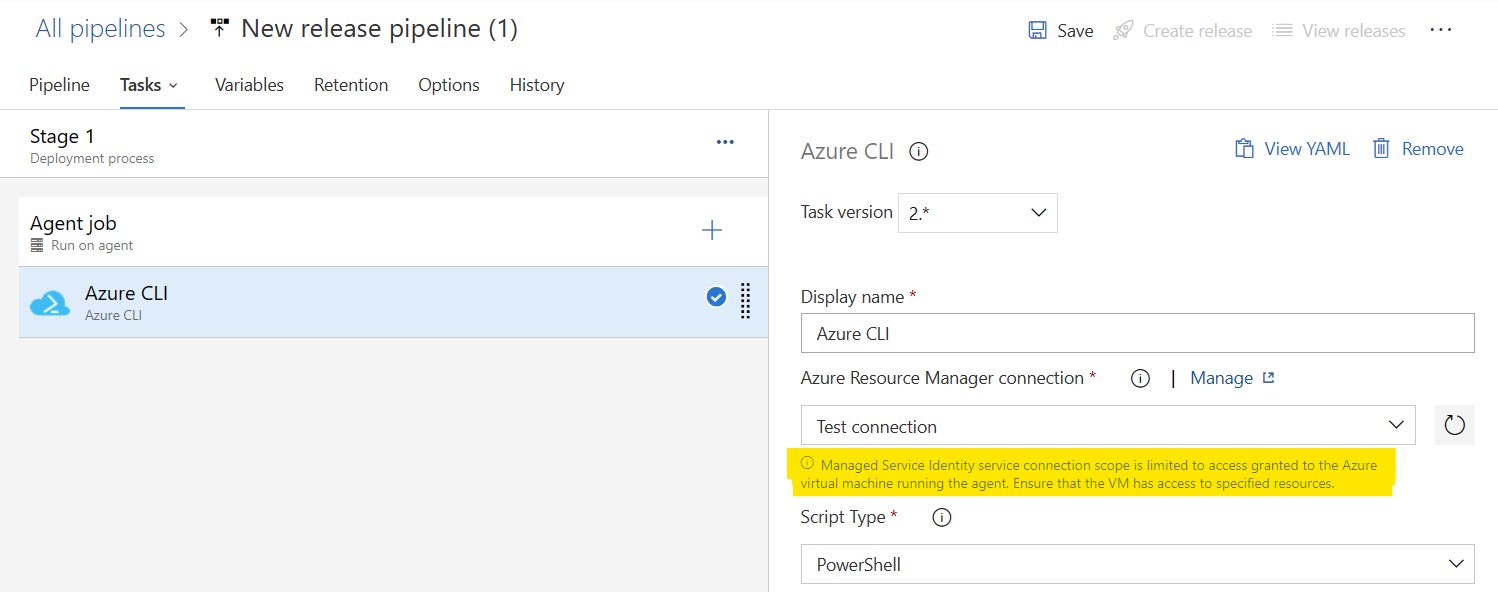
It means that, we will need to create a virtual machine and setup an agent on it. Then only it will work. Follow the steps below to setup the virtual machine:
1. Go to Azure Portal, click on All services.
2. Select Virtual machines, click on Create,and select Azure virtual machine.
3. A configuration page will open which will ask for more details related to Virtual machine.
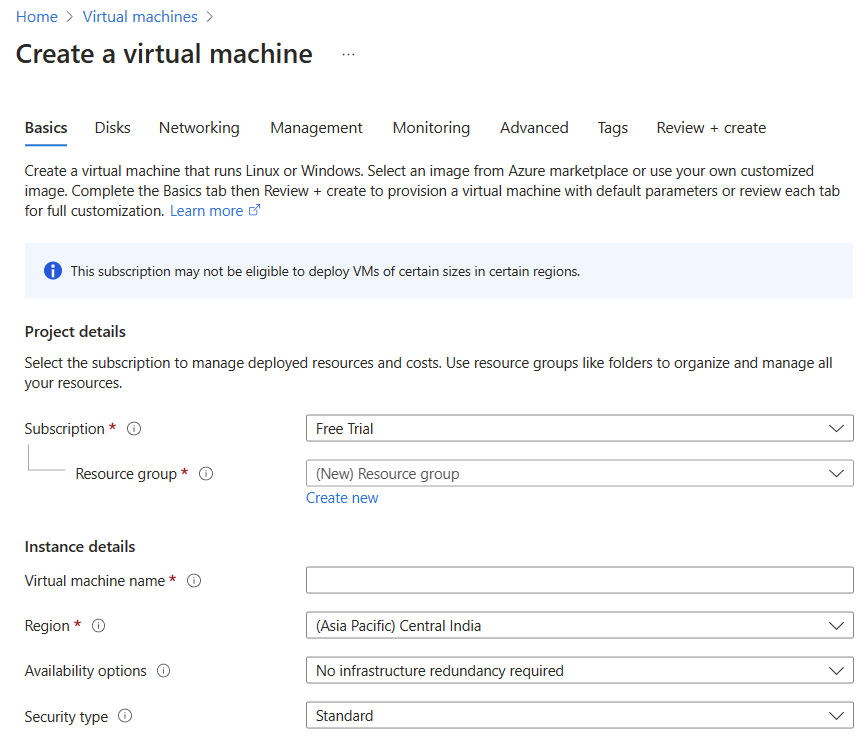
4. When selecting the size, make sure to select enough RAM (1 GB RAM is not enough)
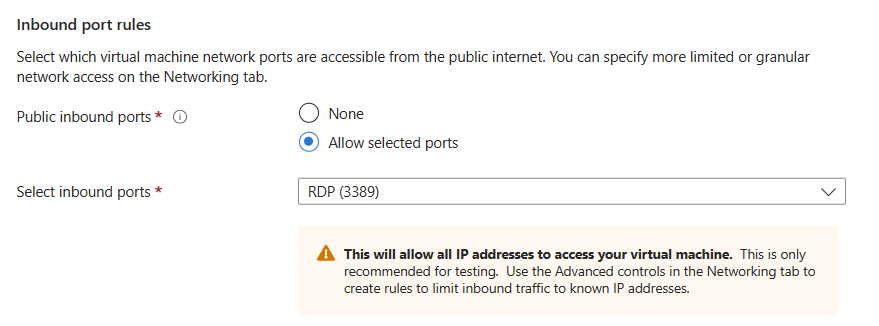
5. I have setup these inbound port rules.
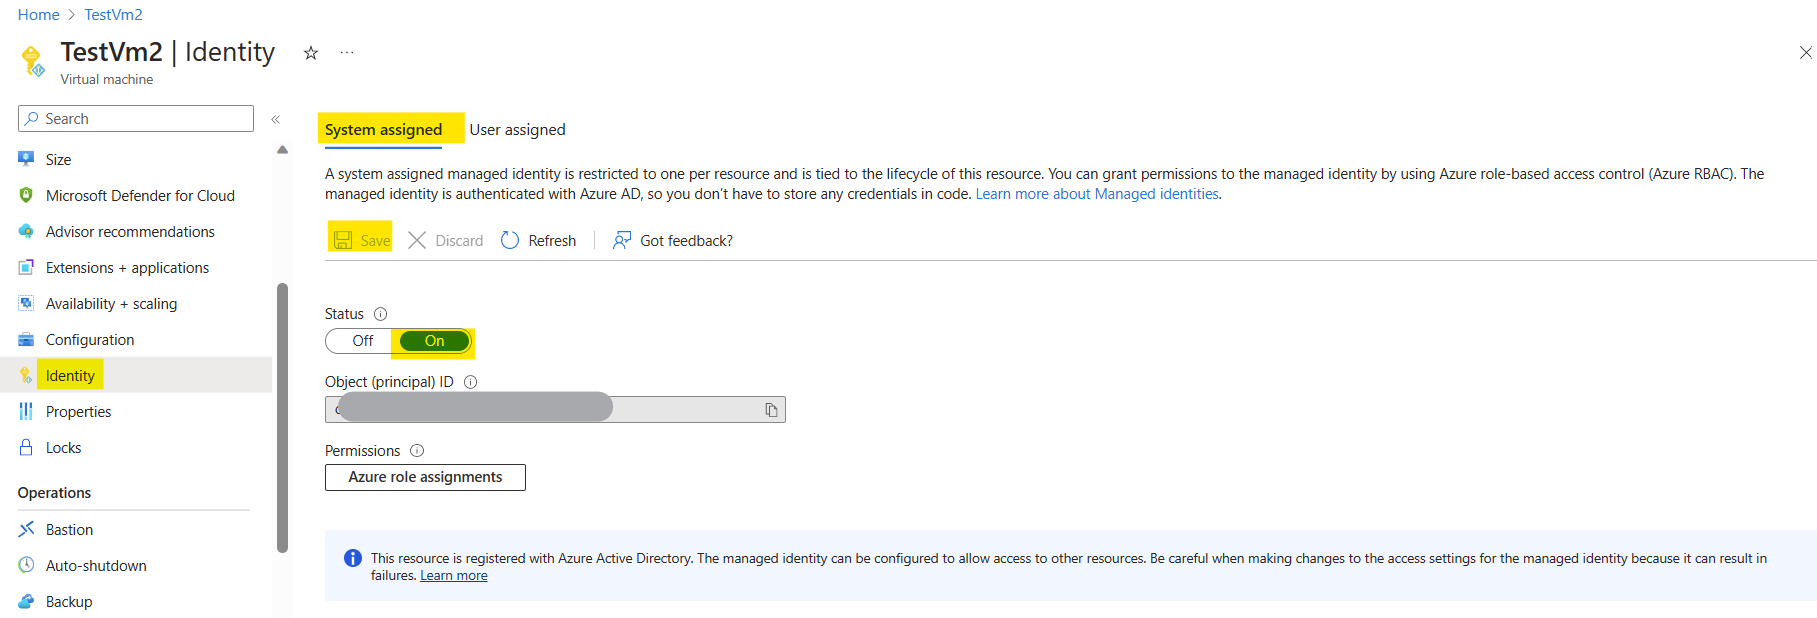
6. After creating the Virtual machine. Go to Identity, which is under Settings. Set the Status to On and click on Save.
Step 3: Provide the Access to the system assigned identity
We need to grant the necessary access of the Azure SQL server to the system assigned identity of VM.
1. Go to Azure portal and click on Azure Active Directory.
2. Click on Groups.
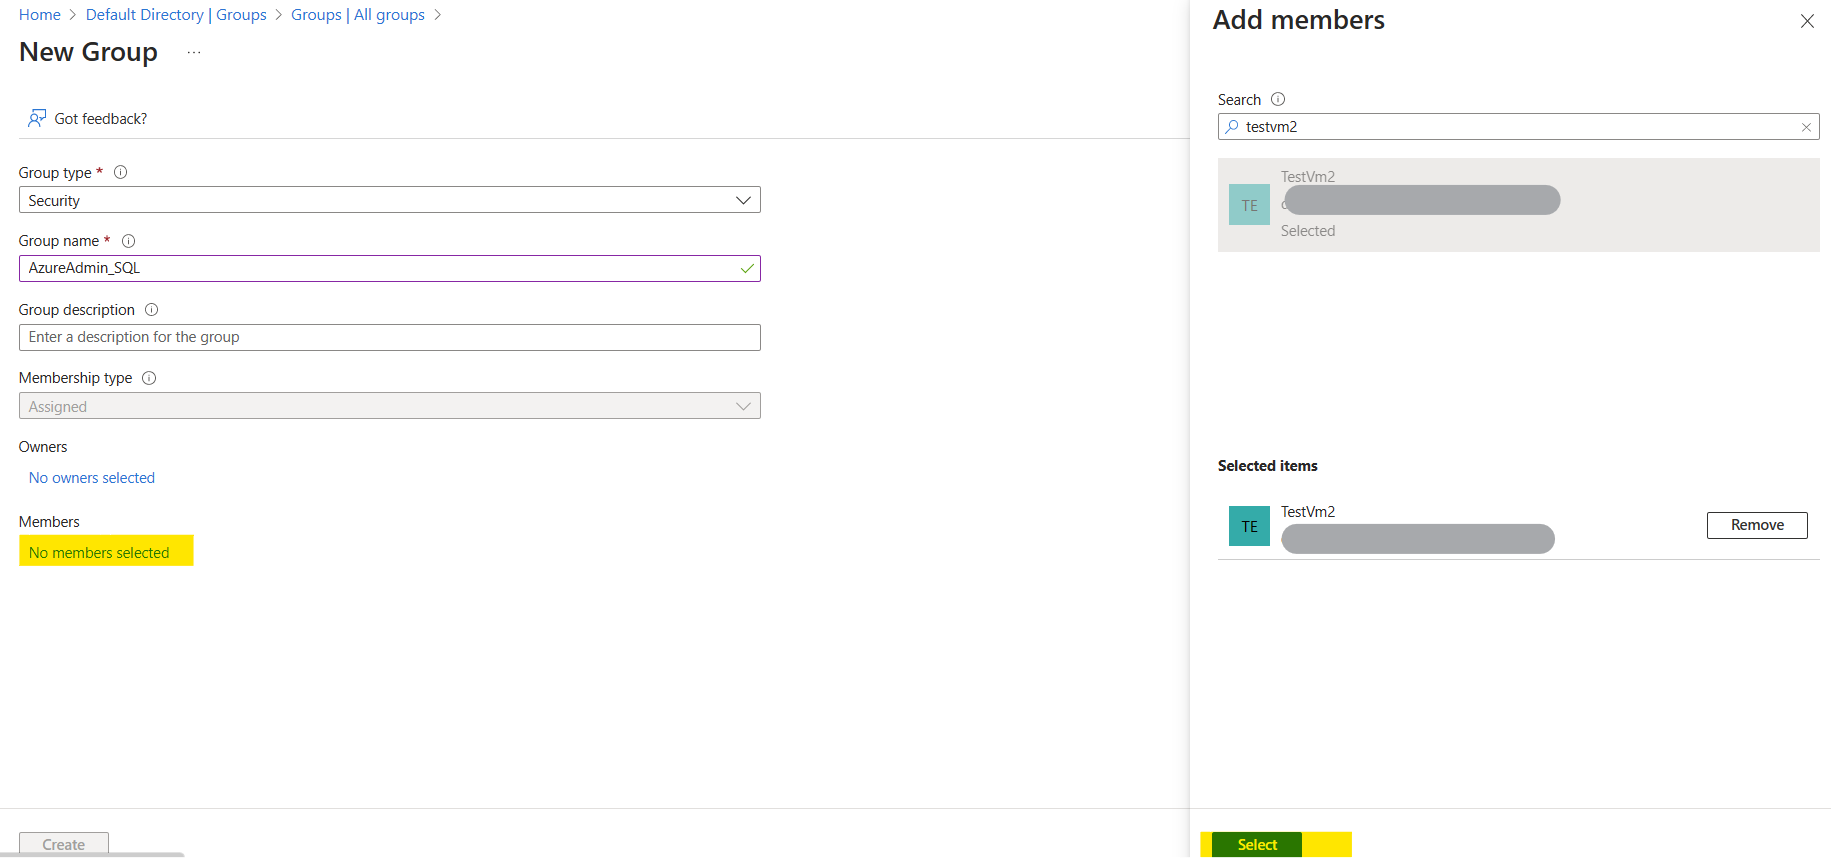
3. Click on New group
4. Give a Group name.
5. Click on link below the Members. It will open Add members page. Search the name of the VM, select it as a member and click on Create to create the group.
We have to set the Azure AD group (AzureAdmin_SQL) as Active Directory admin on the SQL Server. Let’s do this:
1. Go to your SQL Server and click on Azure Active Directory under Settings.
2. Click on Set admin. Select your AD group from the dropdown, click on it and click Select. Click Save to save it.
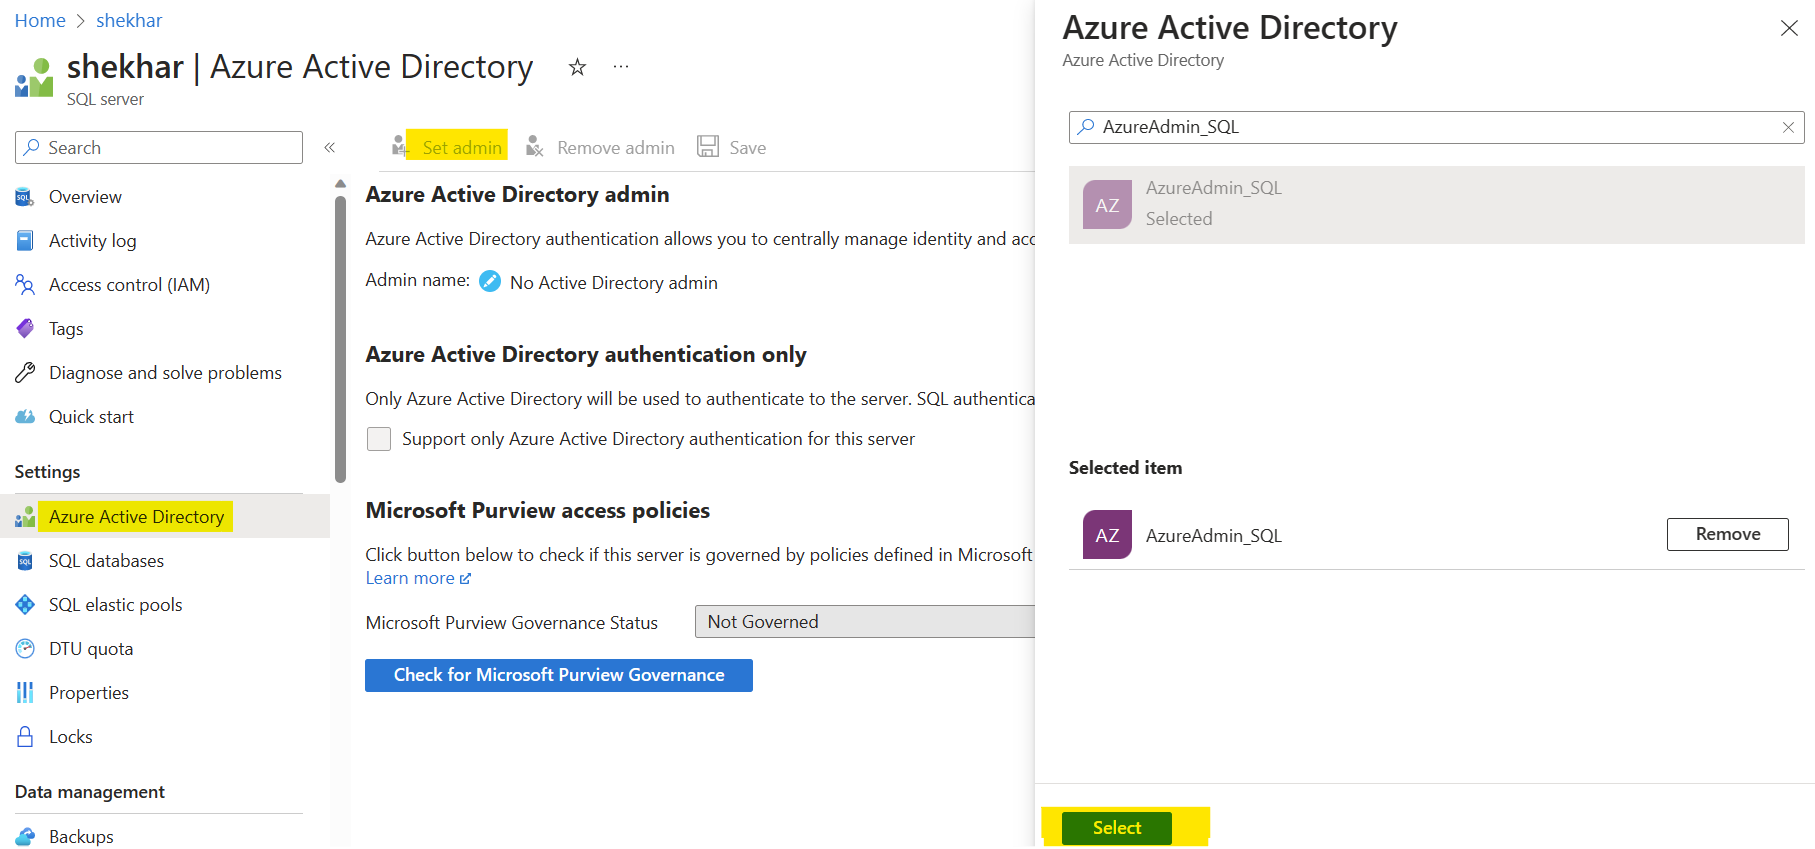
Note: After setting the Azure Directory Admin. The members of that group will be granted administrative privileges on the SQL Server. This means they will have elevated permissions and full control over the SQL Server instance.
Step 4: Install the Azure Devops Agent in VM
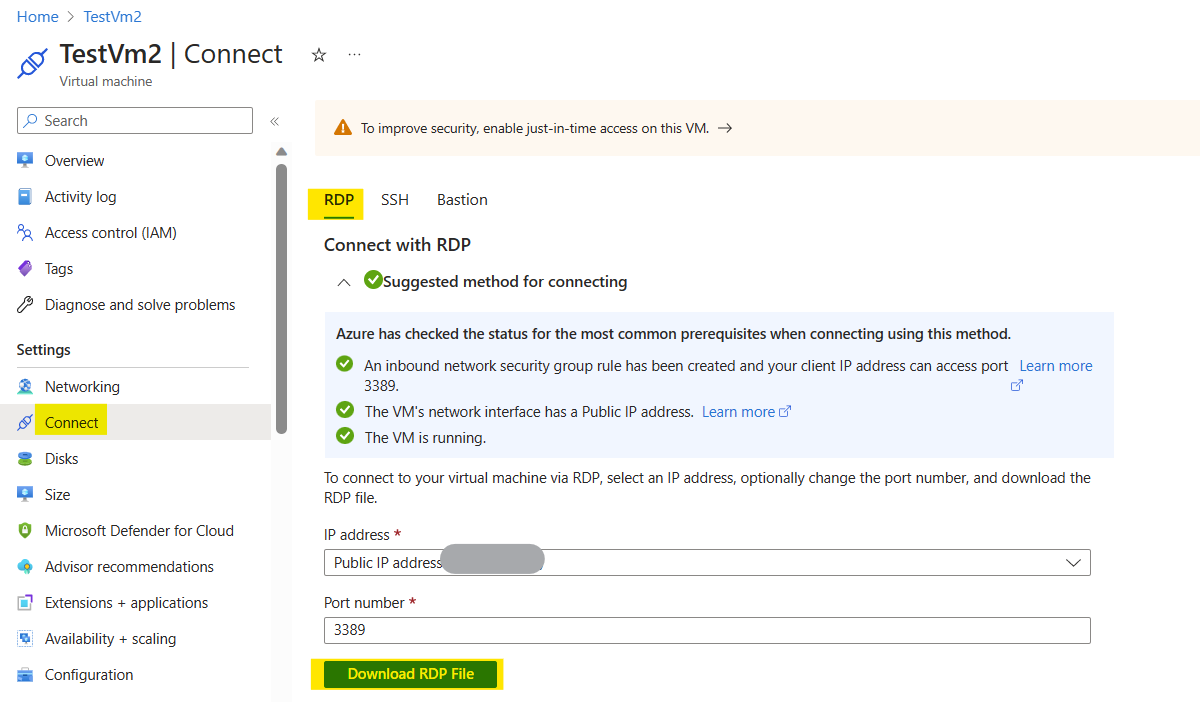
1. Go to VM in the azure portal. Click on Connect.
2. Click on RDP. Make sure to add the the inbound rule for accessing the port 3389.
3. Click on Download RDP File.
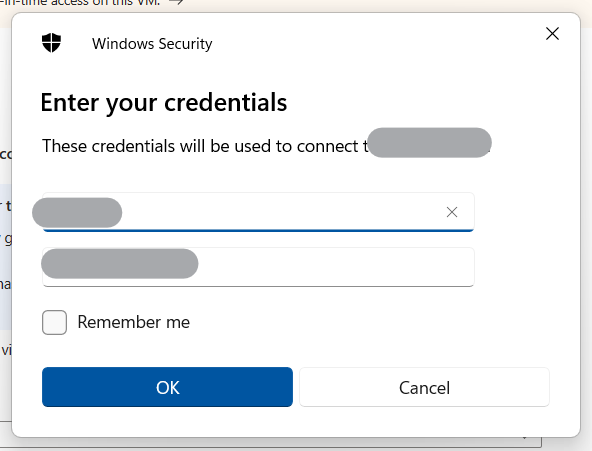
4. Enter the credentials and click on OK.
5. It will take some time for VM to start.
6. Once VM starts, we have to setup the agent there. I have already written a blog for creating the self-hosted agent. Please read it from here.
Step 5: Install some necessary packages in VM
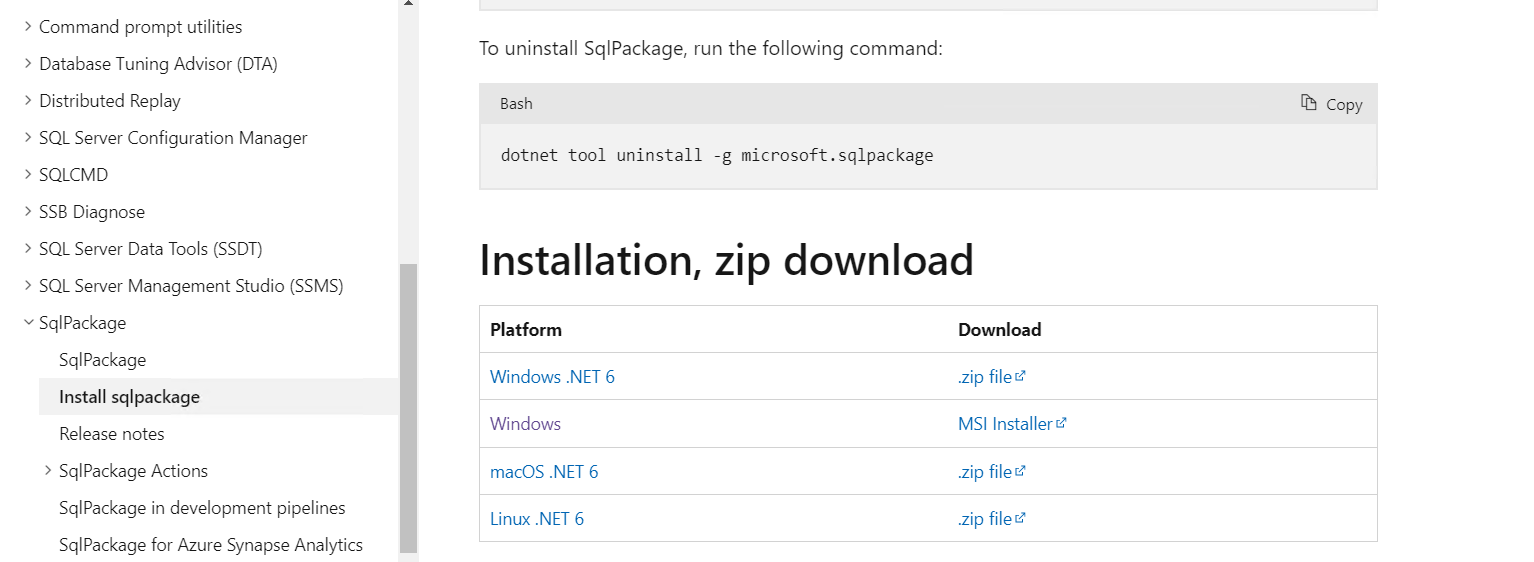
After creating the self-agent in VM. First, we will install SqlPackage in VM:
1. Go to this link, download and install the SqlPackage. We will need this for running SQL scripts.
Then, we will need to install Azure CLI in VM:
1. Go here, download and install Azure CLI.
After installing the above packages. Restart the agent from the Services. In addition, make sure to click on Update all agents button under your agent.

Step 6: Generate an Access Token
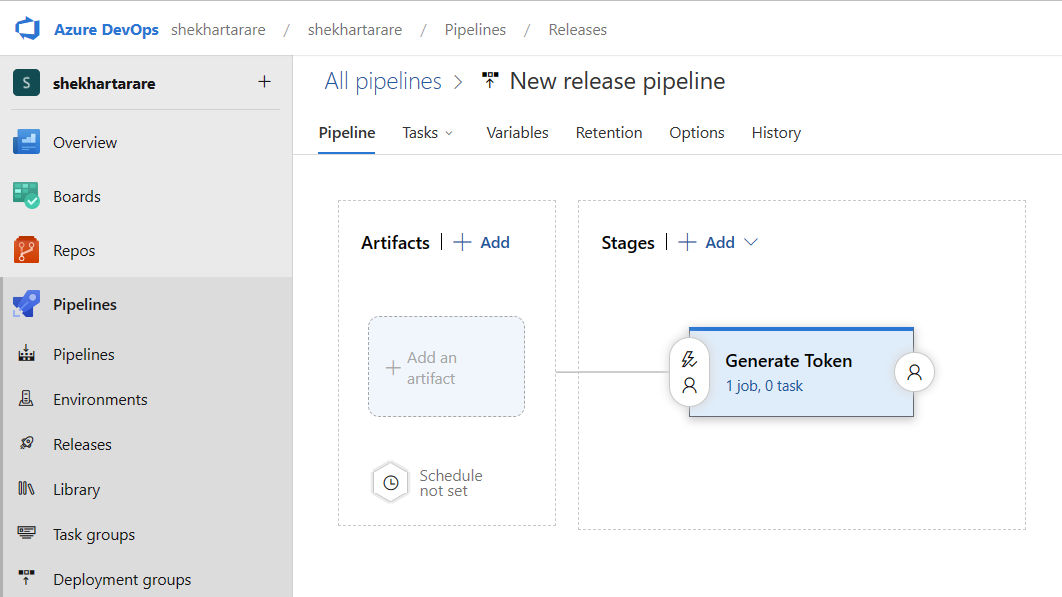
1. Open your Azure DevOps organization and go to your project.
2. Navigate to the Releases section and create a new release pipeline. Add a new empty stage to it and name it anything. I have named it Generate Token.
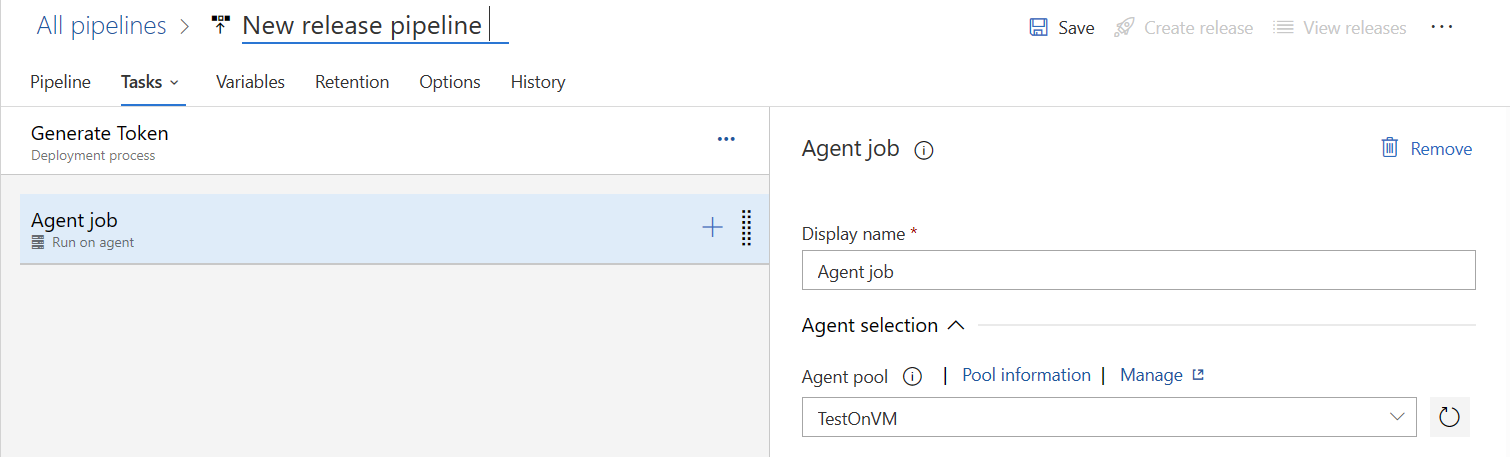
3. Open the Generate Token stage, under the Agent job, select the agent which is running on the VM.
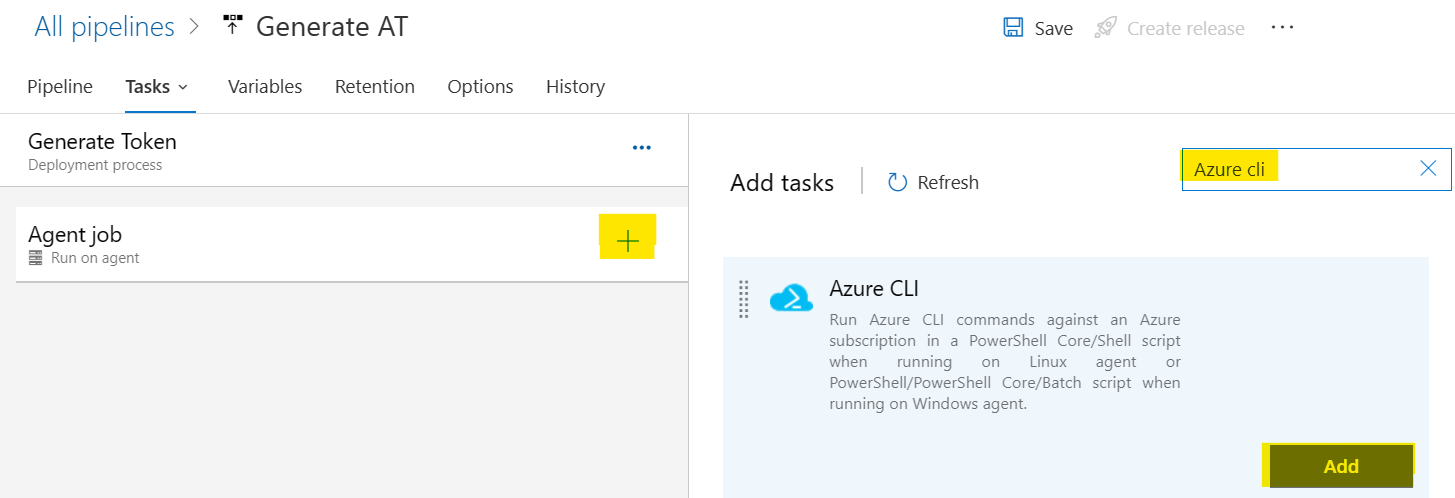
4. Search for the Azure CLI task and add it to the pipeline.
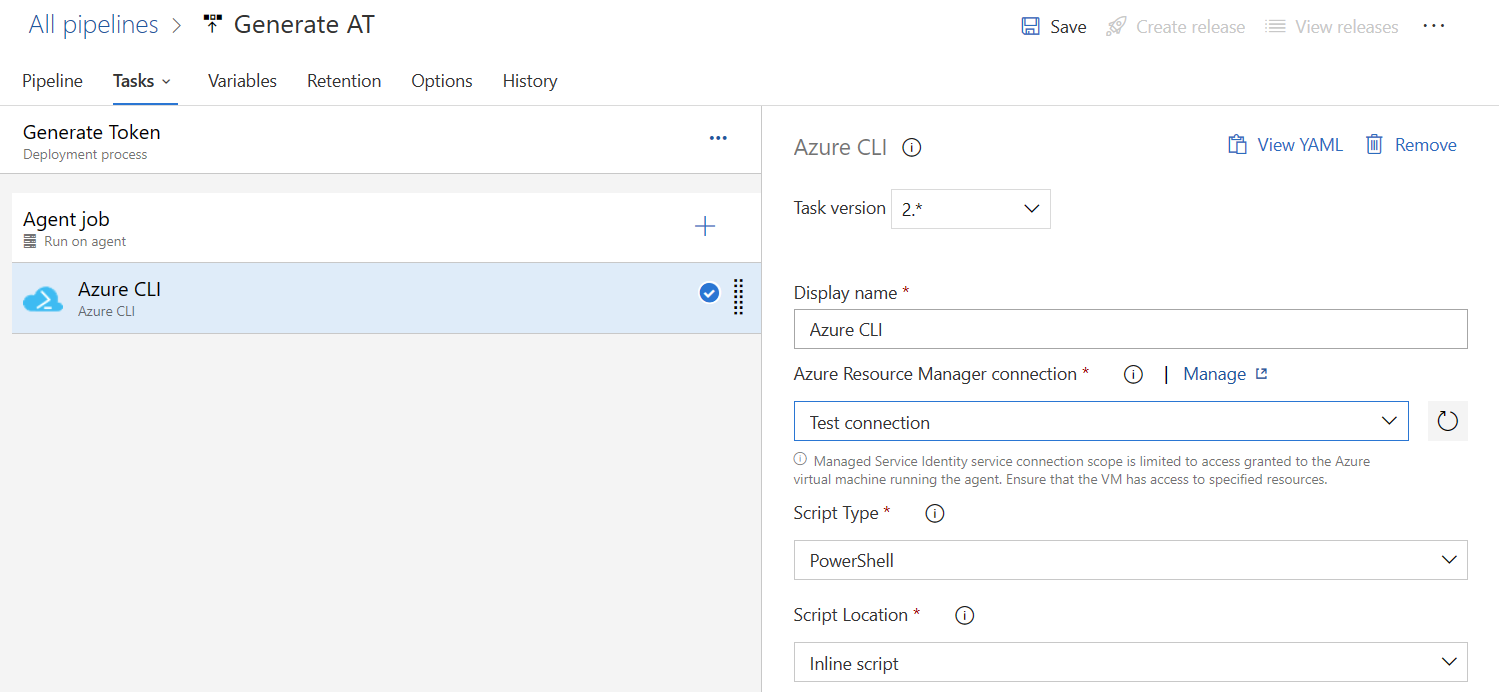
5. Under Azure Resource Manager connection dropdown, select the service connection, which we have created earlier. Select Script Type to PowerShell and Script Location to Inline script.
6. Enter the below PowerShell script under Inline script:
Let’s try to understand the code:
The “az account get-access-token” command retrieves an access token for the specified resource.
The access token obtained using the Azure CLI command with the “--resource“parameter set to “https://database.windows.net” can be used to authenticate and authorize access to Azure SQL Database resources.
The “--query accessToken” option filters the command output to extract the value of the accessToken field.
The extracted access token is assigned to the “$token” variable in PowerShell for further use.
Step 7: Open the SQL Connection and run the script
We can use the access token generated on the previous step to open the SQL connection and run queries. Let’s add a task on the pipeline to do this:
1. Add a new task on our existing stage (Generate Token). Search for PowerShell and add it. Select Inline from the Type dropdown.
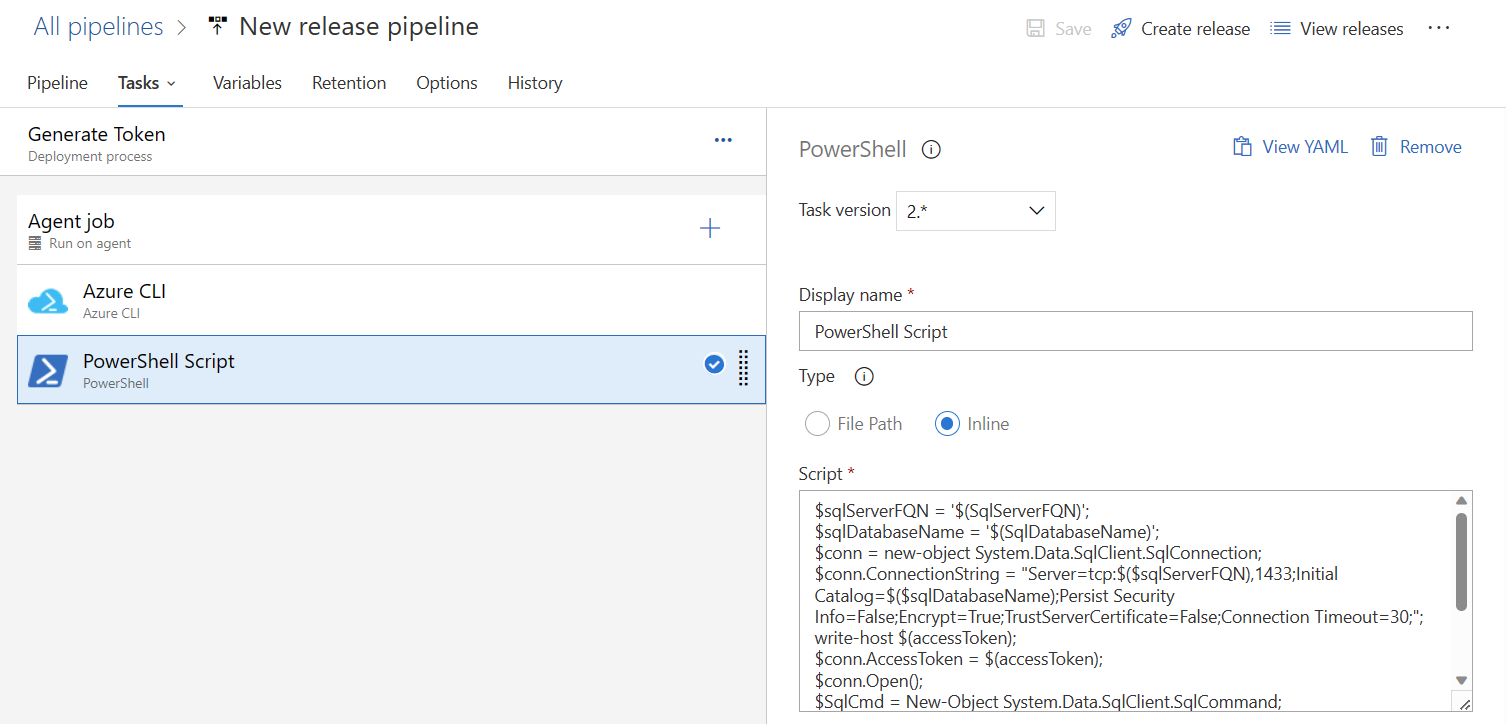
2. Add the below code under Script.
Explanation of the above code:
$sqlServerFQN: Represents the fully qualified name (FQN) of the SQL Server instance.
$sqlDatabaseName: Represents the name of the SQL database.
It opens the SQL connection using the details provided and runs the query.
For testing, we are assigning the role of db_ddladmin to the guest user. It closes the connection after running the query.
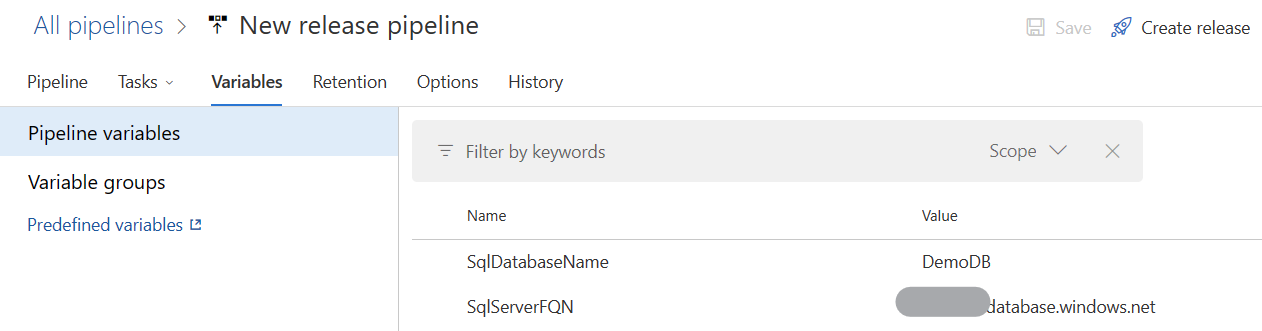
3. Make sure to add these 2 variables by going to variables tab. We are using this in the PowerShell code.
4. Our setup is ready. Run the release pipeline, it will run the query on the database.
Conclusion:
Congratulations, my adventurous friend! You've triumphed over the challenges of running SQL scripts in an Azure DevOps pipeline using a managed identity service connection. With the power of managed identities, you can now securely connect to your SQL databases without the burden of managing explicit credentials. So, go forth and conquer the DevOps landscape, armed with this newfound knowledge!
Remember, the world of DevOps is an ever-evolving realm of excitement, so stay curious, experiment fearlessly, and continue to learn and adapt. Happy scripting, and may your pipelines run flawlessly!
