Introduction:
Azure Pipelines provides a powerful and flexible platform for continuous integration and deployment. While Microsoft offers hosted agents for executing pipeline tasks, there are scenarios where a self-hosted agent becomes necessary. In this blog post, we will walk you through the process of creating a self-hosted agent for Azure Pipelines, empowering you with the ability to run your pipelines on your own infrastructure. Let's dive in!
Prerequisites:
Before we get started, ensure that you have the following prerequisites in place:
1. An Azure DevOps account.
2. Access to the machine that will serve as your self-hosted agent.
3. Administrator privileges on the machine.
Step 1: Install the Azure Pipelines Agent
To begin, we need to install the Azure Pipelines agent on the machine that will act as the self-hosted agent. Here's how you can do it:
1. Open your web browser and log in to your Azure DevOps account.
2. Navigate to your Azure DevOps project and click on Project settings in the left side of the page.
3. Click on Agent Pools under Pipelines and click on Add pool.

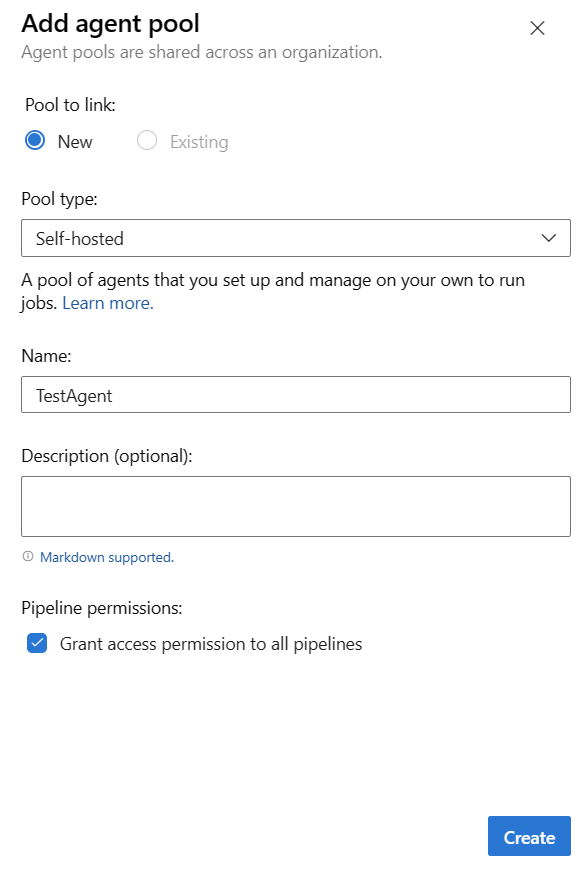
4. Select Pool-type as Self-hosted, give it a name and click on Create.
5. Click on the created agent.
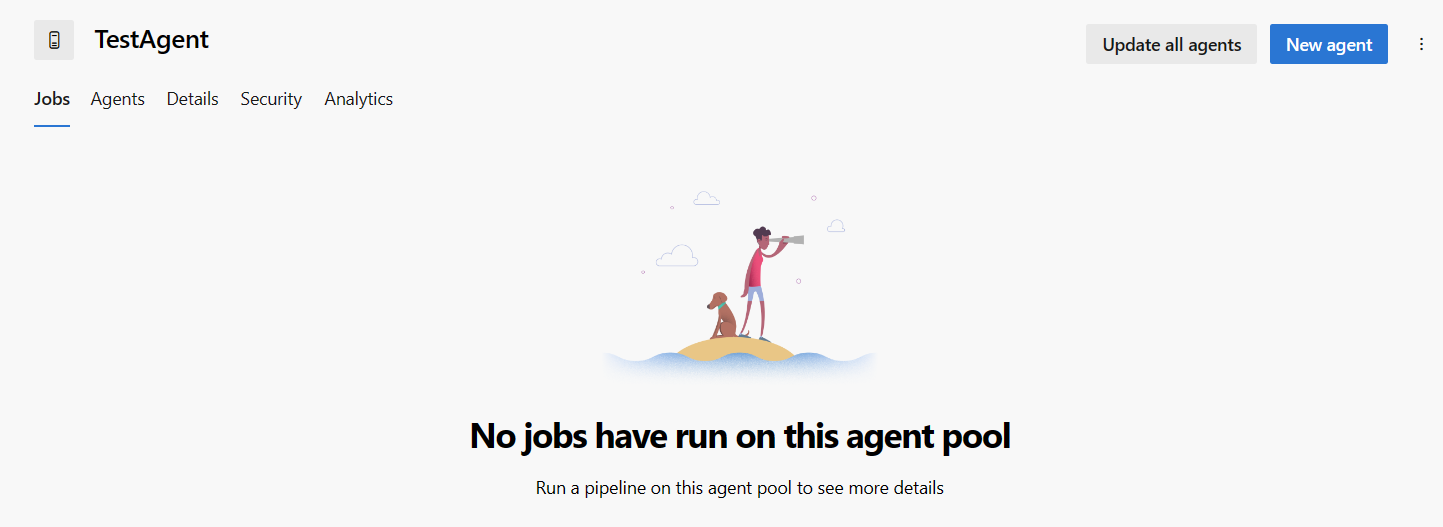
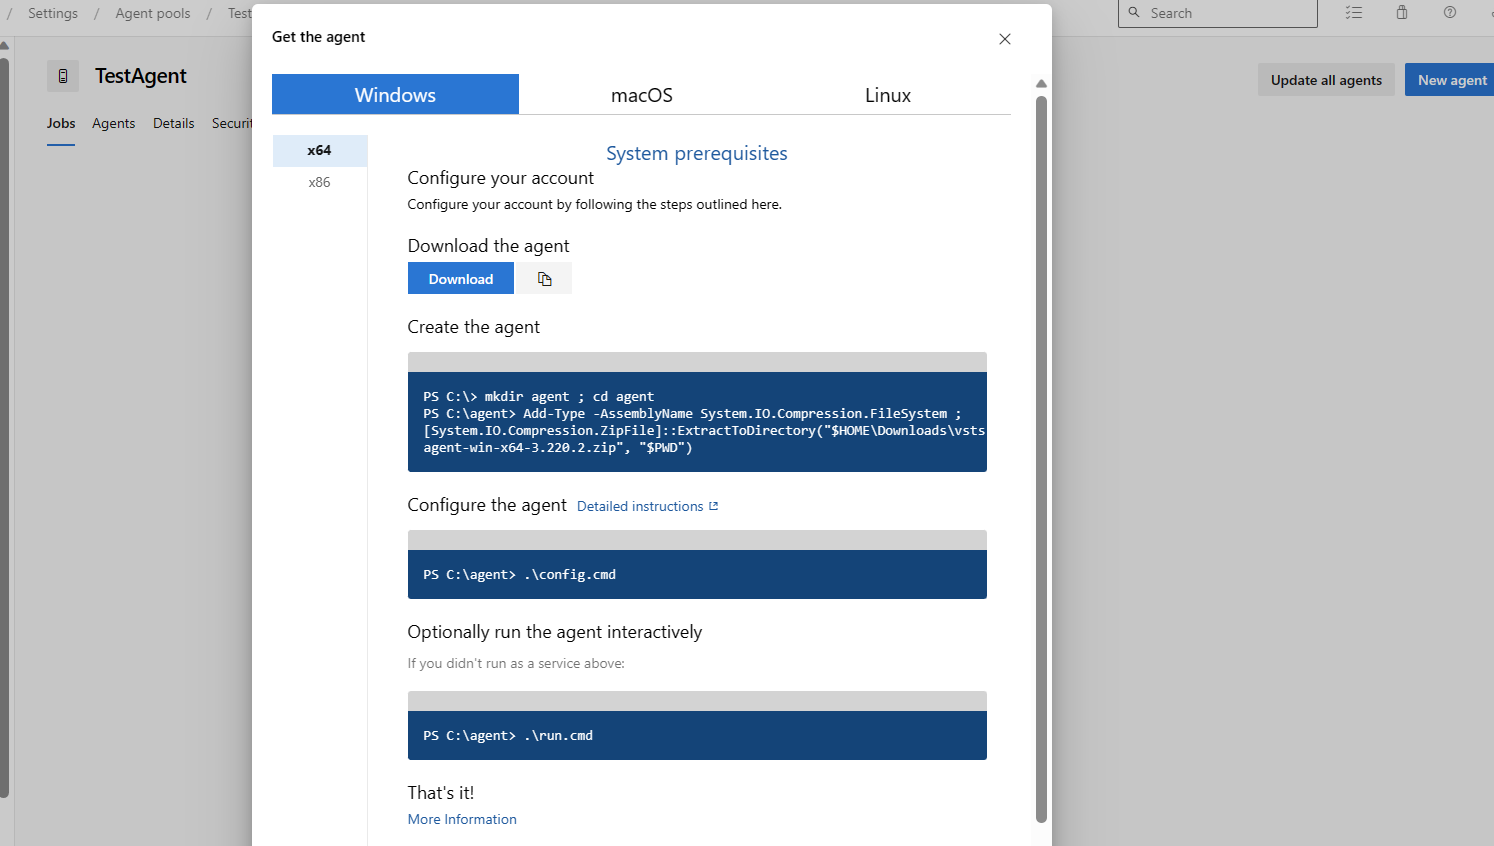
6. Click on New agent. It will show the below screen. We just have to follow the steps to create the agent. Click on the Download button to download the agent.
Step 2: Configure the Self-Hosted Agent
Once the agent package is downloaded, we need to configure it to connect with your Azure DevOps account:
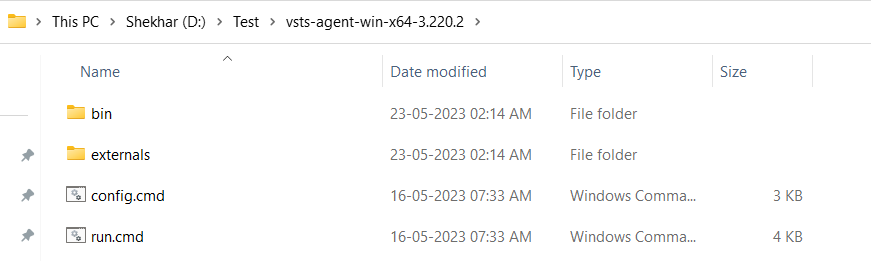
1. Extract the downloaded agent package to a directory on your machine. I have extracted the files in the below directory.
2. Open a terminal or command prompt and navigate to the extracted agent directory. Make sure to run the terminal or command prompt as Administrator.
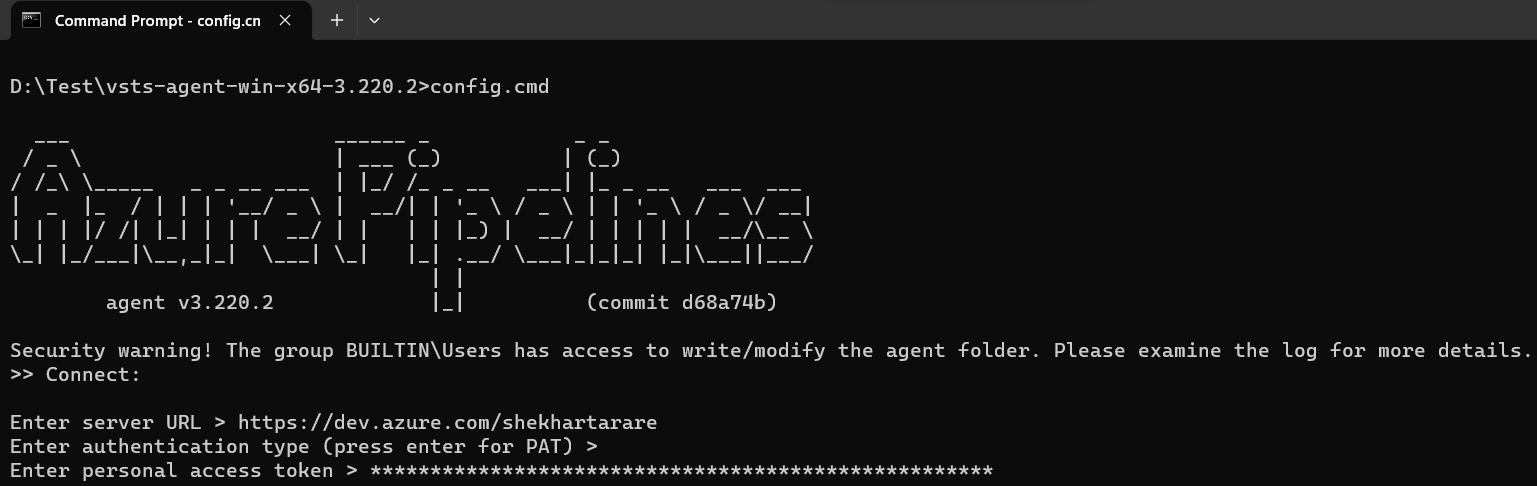
3. Run the configuration script by executing the following command:
· On Windows: “config.cmd”
· On Linux or macOS: “./config.sh”
4. The configuration script will prompt you for your Azure DevOps account URL and a personal access token (PAT).
· To generate a PAT, go to your Azure DevOps account, click on the small icon on the left side of your profile picture in the top-right corner, and select Personal access tokens from the dropdown menu.
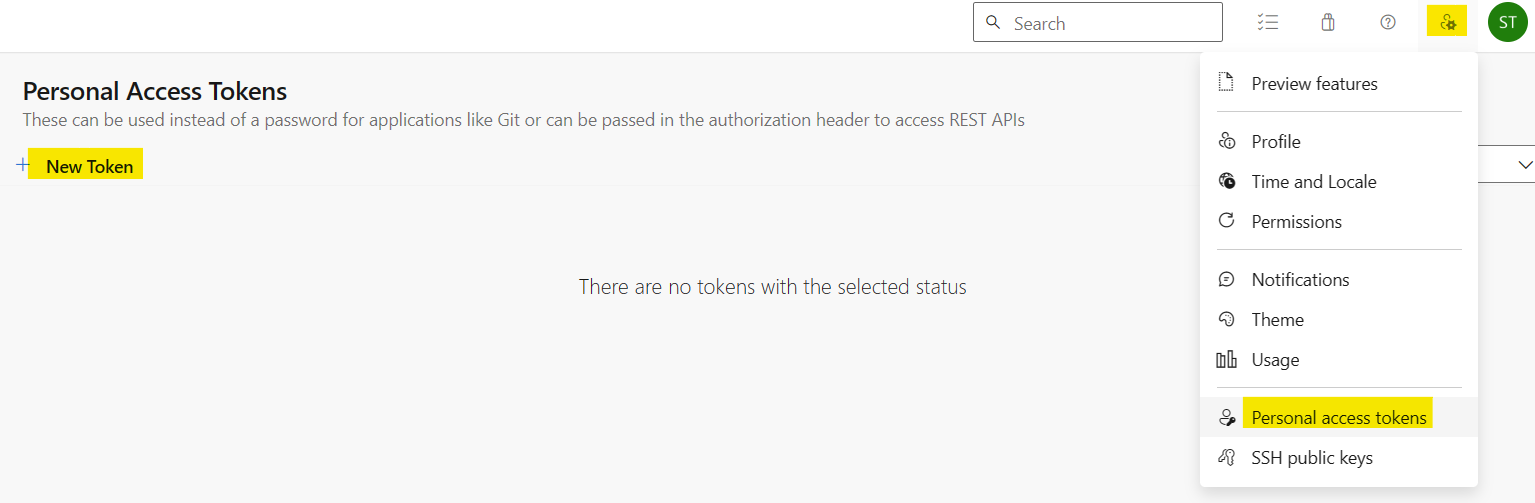
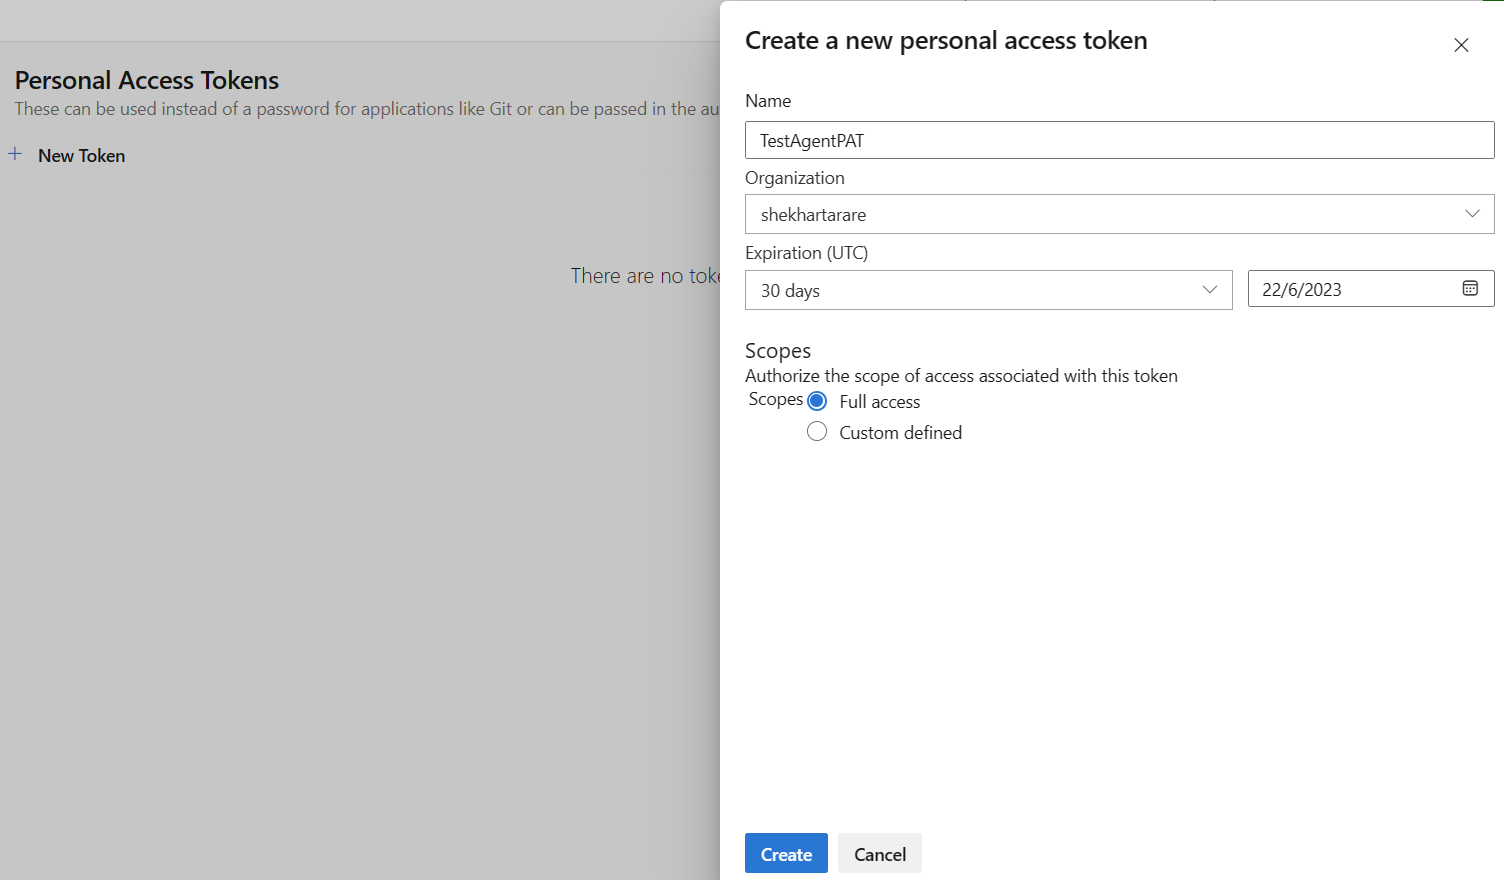
· Generate a new token with appropriate permissions for the agent.
· After clicking the Create button, you will come to other screen where the PAT token will be shown. You just have to copy that. Remember that the token will be shown only once.
5. After generating the token above, enter the details on the command prompt..
6. After entering the PAT, it will ask to enter the name of agent pool. Enter the name of the pool, which we have created above.
7. Now, it will ask for agent name and few more details.
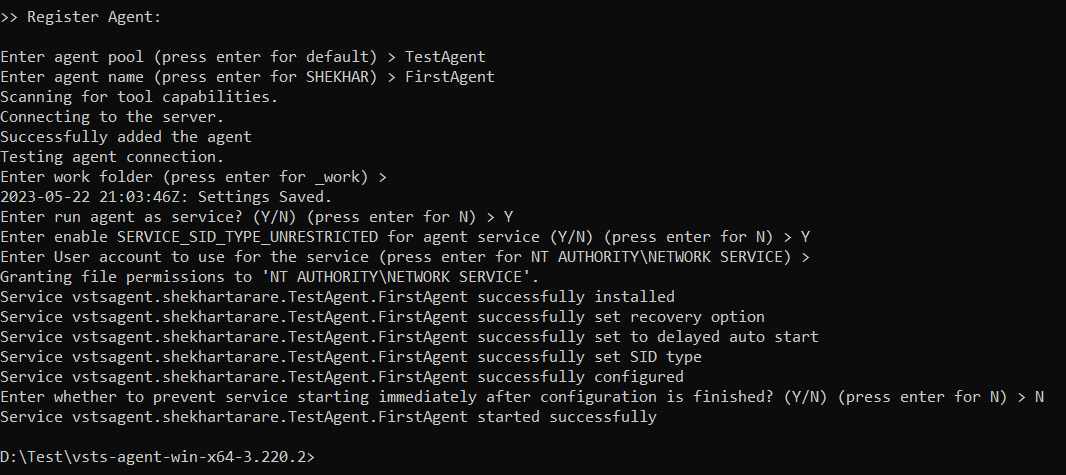
8. I have given the permission to run the agent as a service in my machine. I can go to Services and see that.

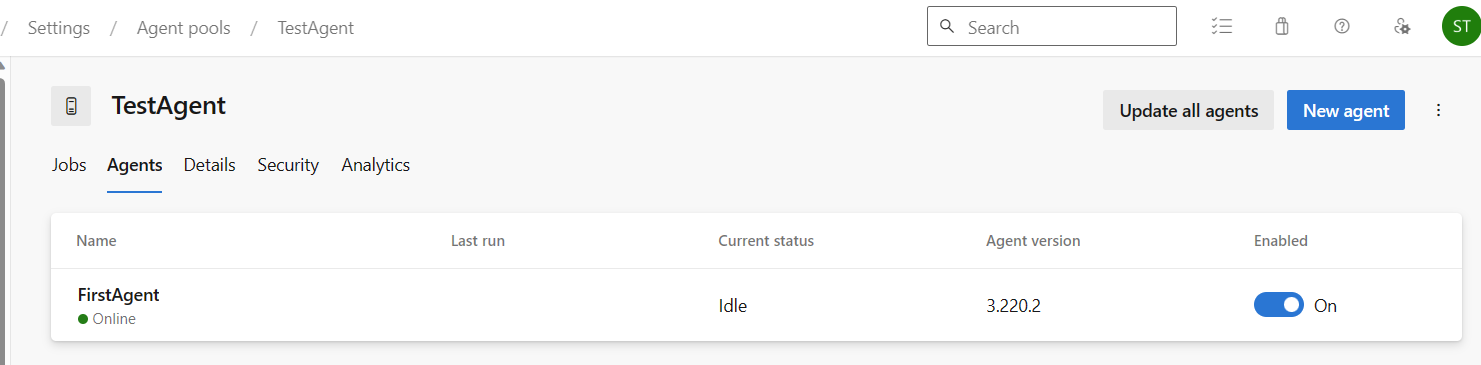
9. After completing the configuration, the agent will register itself with the specified agent pool in Azure DevOps. Now, if you go back to your agent, you will see one agent.
Step 3: Use the Self-Hosted Agent in Pipelines
Now that the self-hosted agent is up and running, you can start leveraging it in your Azure Pipelines:
1. Open your Azure DevOps project and navigate to your pipeline.
2. Edit your pipeline configuration or create a new one.
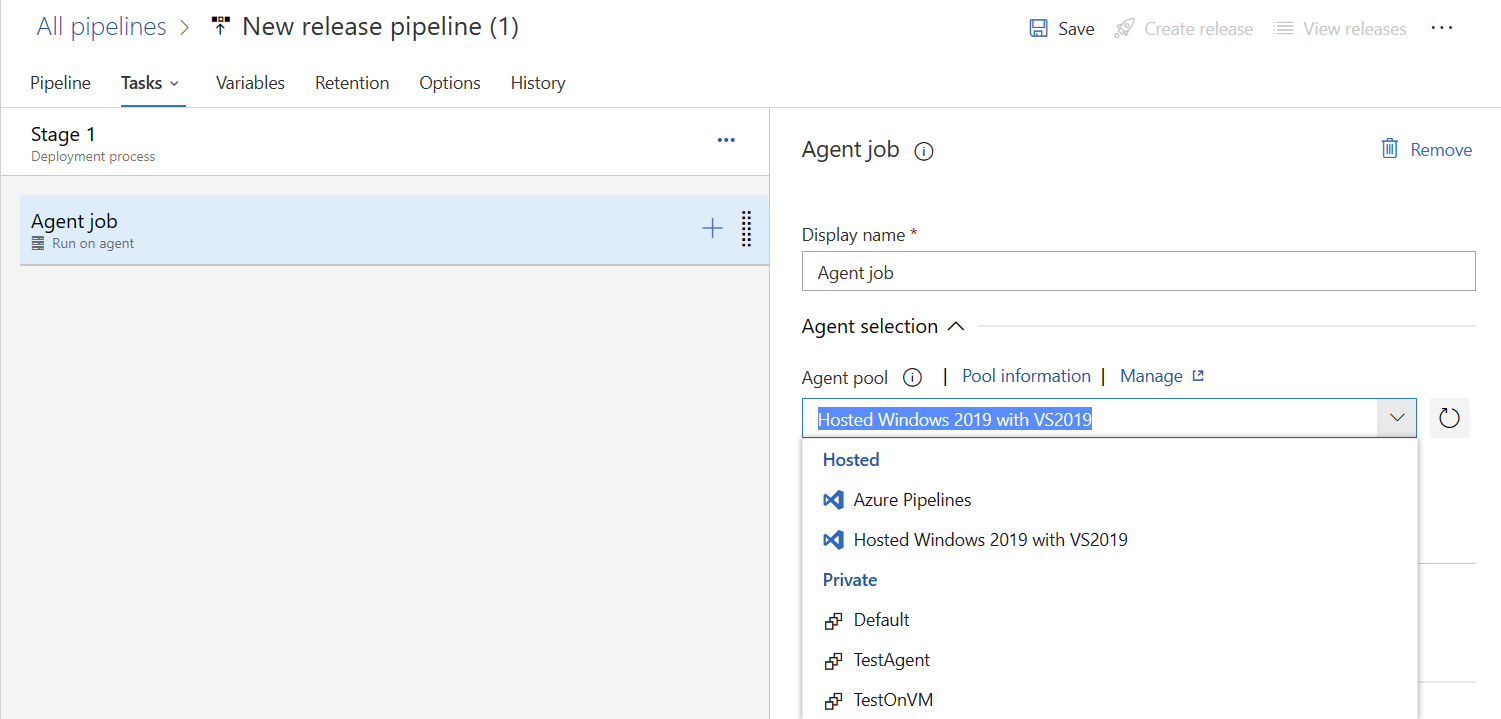
3. If you click on the stage, and then click on Agent job. In the Agent selection dropdown, you will get your self-hosted agent as an option. Just select that.
4. When you run the pipeline, Azure Pipelines will allocate a job to the self-hosted agent and execute the defined tasks on the configured machine.
Conclusion:
Congratulations! You have successfully created and configured a self-hosted agent for Azure Pipelines. By following these steps, you can harness the power of your own infrastructure to execute pipeline tasks, ensuring greater control and flexibility in your continuous integration and deployment workflows. Explore the possibilities and take your Azure Pipelines to the next level with self-hosted agents. Happy coding!
